GAPS Diet Journey Logo

Blog

  • The Jalapeno Incident Part 1

    The Jalapeno Incident Part 1

    A few months ago when I purchased one of the vegetable boxes from Market on the Move I acquired two pounds of jalapenos and although I like jalapenos I can’t eat two pounds worth before they go bad so I decided – since I was dehydrating other vegetables – I would try it with the jalapenos.

    I roasted the jalapenos under the broiler and when they were blackened on all sides, placed them in a glass bowl covered with aluminum foil to steam. After a few minutes the skins were easy to remove so I put on gloves and proceeded to remove the skins, stems and most of the seeds. I laid them out on my dehydrator and let them dry for 24 hours. Lastly I used my Magic Bullet [affiliate link] which is a completely closed system to pulverize the dried jalapeno peppers into powder.

    I literally fell in love with the product. Jalapenos have a Scoville Heat Unit of between 3500 and 8000 units. This jalapeno powder is a nice mild heat, at least in my opinion. I sprinkled it on everything I ate for several days: scrambled eggs [affiliate link], vegetables, mixed with butter and spread on meat or toast or vegetables… I even mixed up a concoction of peanut butter [affiliate link], honey [affiliate link], cocoa powder [affiliate link] with some jalapeno powder and yowsa! Yum! After a few days I started to have trouble sleeping. I’d go to bed at night, sleep for a couple hours and then I’d be wide awake. This was troublesome for me as I know how important it is to get the right amount of sleep. After a few nights I told my husband, “Watch, just watch. I bet it’s the jalapenos.” The next day I googled jalapenos and insomnia and found I was right. Reluctantly I tore myself away from this decadent addiction. I used up the remaining powder by using it only at breakfast and sometimes at lunch.

    But I haven’t forgotten about jalapeno powder and when a local grocery store had them on sale four pounds for $0.96 with a limit of eight pounds, naturally I bought eight pounds and planned to process them the next day.

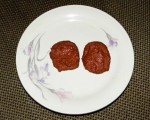
    And I did so… on Friday morning I gloved up, then roasted, peeled, removed seeds and stems and laid the peppers on the dehydrator trays. I dehydrated them outside on the porch and twenty fours later they were crispy and dry. On Sunday morning I set about peeling the dried peppers from the trays, crinkled them into the Magic Bullet blender cup and whirred until they were pulverized and reaped the rewards of my hard work: 5.5 ounces of dried jalapeno powder.

    Day 1
    But then… something else happened… at first I noticed on Sunday night that my chin had these weird bumps. My skin is very smooth and I’ve rarely had acne, even as a teen. Then I noticed my cheeks had bumps. Soon my face began to burn. And itch. And burn. And itch.

    Day 2
    I wasn’t sure yet what was going on. Finally, I realized on Monday night that I must have exposed myself to the jalapenos. Ya think? I realized at that point that I had not worn gloves when peeling the jalapenos from the trays. I called poison control to see if they could offer me any suggestions of what I could do. They said people who work with peppers have found ketchup or vinegar and water to be of help, but this was for their hands. I did try the vinegar and water solution on my face, but it did little to help.

    My face felt really tight and dry, so I got the brilliant idea to smooth some coconut oil [affiliate link] onto my face. That’s when the burning started in earnest.

    Day 3
    Another sleepless night, and I was unable to go to work. I learned while doing some more online research I learned that rubbing oil or even using an oil based soap will cause the capsicum microbes to penetrate deeper into the skin tissues and pores. I also learned because so much time had passed the only thing I could do was wait until my skin began peeling to slough off the capsicum microbes. The burning intensified, along with the itching.

    Day 4
    I absolutely had to go in to work on Wednesday and I was a sorry site. My nose and cheeks were red, the skin around my eyes was slightly swollen and I could hardly concentrate for the itching and burning. Wednesday was another sleepless night.

    Day 5
    I had no choice at work, I had to go in to work on Thursday as well. Thursday afternoon one of my coworkers offered me a small tube and suggested that I try using it. It gave relief and I was grateful, only bothering to research it after the fact to find it was a heavy duty steroid cream! My skin had already started to peel so I was glad the healing process was moving along.

    Days 6, 7, 8
    I awoke on Friday morning to find my eyes were more swollen than the prior days. Saturday they were worse, and Sunday amazingly, they were even worse! The lower part of my face was still burning and itching, and peeling, but now the tissues surrounding my eyes were being affected. Someone had mentioned using Tucks Medicated Pads on my eyelids, and so I had my husband bring some home. I spent time lying in bed with a bag of frozen peas on my eyes. I had started to take Benadryl and it didn’t seem to be doing much of anything, so my husband bought a new pack, and found the kind that has no dyes. Finally it seemed the Benadryl was helping, and also causing me to sleep for many hours. We checked the old pack and it said it expired next month, but my husband had been carrying it around with him in the heat (he has to go under homes and there are often scorpions and spiders, and other scary poisonous critters and he plans to take Benadryl if he is stung or bit).

    With my eyes swelling, I began to assess every movement I was making. I kept researching on the Internet and by this point I’m realizing in essence it’s as if I’ve been pepper sprayed. Did you ever stop to think how dangerous this stuff is? Sure you can protect yourself, but if you happen to squirt the stuff in the wrong direction, or heaven forbid the wind is blowing… you’re going to be in some kind of pain. The best thing you can do is wash your face as quickly as possible with a product like Dawn dishwashing liquid to try and remove the capsicum from your skin.

    I started to realize that when I sit at my computer I end up putting my fingers on my face, thereby spreading the capsicum microbes. And I realized that I must have the microbes on my pillow… and then my husband told me when he was sitting at the computer he touched his face with his fingers and his face began to burn! That is when I realized I had contaminated my keyboard and my mouse!

    The story doesn’t end here, stay tuned for the next installment tomorrow.

    GAPS DIET JOURNEY is a participant in the Amazon Services LLC Associates Program, an affiliate advertising program designed to provide a means for sites to earn advertising fees by advertising and linking to AMAZON.COM. GAPS DIET JOURNEY is an affiliate for several companies and may be compensated through advertising and marketing channels. Therefore, this post may contain affiliate links.

  • White Scum “Bloom” When Making Pickles – Fermenting Cucumbers

    White Scum “Bloom” When Making Pickles – Fermenting Cucumbers

    Back in June 2009… on June 20th to be exact… I started some pickles, using cucumbers grown fresh from my garden. I ate the first jar rather quickly, but the second jar has been slowly savored. It has been sitting in my fridge the last couple of years… every once in awhile I eat a couple slices for the probiotics. When I pull the jar out today, which had been completely undisturbed for several months, there was a white layer floating on the top. This white layer is sometimes referred to as being mold, white scum or “bloom”. This post on making sauerkraut at Wild Fermentation mentions this phenomenon.

    A few weeks after beginning these pickles, I noticed that each one was coated with a white layer. I noted it, but didn’t pay much attention to it, and around 90 days in the fridge, the white layer had disappeared. These pickle slices are still crunchy. I followed the basic recipe from Nourishing Traditions which is:

    Wash the cucumbers and tightly pack into a quart-sized wide-mouth mason jar.

    Place these ingredients together and mix and pour over the cukes:

    1 tablespoon mustard seeds
    2 tablespoons fresh dill, snipped
    1 tablespoon sea salt [affiliate link]
    4 tablespoons whey
    1 cup filtered water

    If you don’t use whey, use 2 tablespoons sea salt. The top of the liquid should be one inch below the top of the lid for fermentation and expansion. Cover tightly and keep at room temperature for three days, then refrigerate.

    When I made mine, I didn’t use mustard seeds or dill, only the 2 tablespoons salt!

    Here is a video of what the white scum at top looks like, and I will show the white substance at the bottom, in the video you can see how the white substance at the bottom swirls around in the pickle juice when I move the jar.

    I have taken some photos to illustrate what this “bloom” looks like, but I also wanted to share that I’ve seen it look much whiter. What it reminds me of, when I see it and it is very white, it looks like someone sprinkled a very fine layer of talcum (baby) powder on top. It may look as if it has ripples or cracks.

    White scum "bloom" floating on top of pickles

    Homemade pickles, white layer floating on top

    Fermented cucumbers - pickles

    Do It Yourself Pickles - White Mold

    In addition to the top layer, there will sometimes be white substance settled at the bottom of the jar.

    White sediment on bottom of homemade pickles

    Pickles From My Garden

    GAPS DIET JOURNEY is a participant in the Amazon Services LLC Associates Program, an affiliate advertising program designed to provide a means for sites to earn advertising fees by advertising and linking to AMAZON.COM. GAPS DIET JOURNEY is an affiliate for several companies and may be compensated through advertising and marketing channels. Therefore, this post may contain affiliate links.

  • Three Chocolate Peanut Butter Cookies Using Coconut Flour Grain Free

    Three Chocolate Peanut Butter Cookies Using Coconut Flour Grain Free

    Peanut Butter Chocolate Cookies for One

    Since I’m really the only one doing GAPS at my house when I make sweet treats I need to make as small an amount as possible. For I have learned if it’s there, Starlene will eat it until it’s gone. So today, when I saw this recipe for Peanut Butter Chocolate Cookies at Health, Home Happiness I knew I had better not even consider making two dozen of these babies.

    First I quartered the recipe, and then I halved that so that I would end up with three little cookies. I even did a calorie count and found that each one was just under 100 calories. Not too bad. Even though I’m not counting calories… sometimes I just like to know I’m not eating 1000 calories worth of dessert, ya know?

    My recipe is slightly different than Cara’s, the ingredients are the same for the most part (I omitted the egg and used raw cacao powder) but my measurements are a bit different (I used about three times as much coconut flour [affiliate link] and twice as much cocoa).

    • 2 Tablespoons peanut butter [affiliate link]
    • 1-1/2 teaspoons coconut oil [affiliate link]
    • 2-3/4 teaspoons coconut flour
    • 1 teaspoon honey [affiliate link]
    • 2 teaspoons raw cacao powder (you can also use unsweetened cocoa powder [affiliate link])

    Bake at 350°F for 10 minutes. Do not overcook.

    The cookies will be fudge-like.

    Makes three small cookies, just enough to make one person happy.

    Recipe: Three Chocolate Peanut Butter Cookies Using Coconut Flour Grain Free
    Author: 
    Recipe type: Candy
    Cook time: 
    Total time: 
    Serves: 3 cookies
     
    Ingredients
    • 2 Tablespoons peanut butter
    • 1-1/2 teaspoons coconut oil
    • 2-3/4 teaspoons coconut flour
    • 1 teaspoon honey
    • 2 teaspoons raw cacao powder (you can also use unsweetened cocoa powder)
    Instructions
    1. Mix all ingredients together.
    2. Bake at 350°F for 10 minutes.
    3. Do not overcook.

    Save

    If you love desserts like this, I have two cookbooks you really need to check out ASAP! Naturally Sweetened Treats for gluten-free dessert needs and Baker’s Dozen Volume 4, Chocolate Treats for amazing chocolate desserts and snacks.

    Save

    GAPS DIET JOURNEY is a participant in the Amazon Services LLC Associates Program, an affiliate advertising program designed to provide a means for sites to earn advertising fees by advertising and linking to AMAZON.COM. GAPS DIET JOURNEY is an affiliate for several companies and may be compensated through advertising and marketing channels. Therefore, this post may contain affiliate links.

  • Day 535 Almost 20 months on GAPS

    I have been very, very busy in the past couple of weeks. On Friday I went into town, taking one of my precious days off work to ferry around one of our clients who is blind. She has been helping us to gather prizes for our annual raffle and she was sorrowful at not having been able to sell many tickets. I knew it would really brighten her day if I took her around to sell tickets and I have always enjoyed spending time with my elders. She is 79 years old and quite the firecracker. We ended up selling almost 700 tickets! She had an idea to go to the fire stations and one of the captains took an instant liking to her and rallied up his guys to buy tickets, and then set us up to go to another fire station where they beat the amount the first station had bought. It was a fun day, but essentially I lost an entire day at home so I feel like I’m behind on everything. I did however get caught up on my husband’s accounting, and we had our weekly meeting so I at least accomplished that. But I really need a housekeeper to help me with the housework!

    I had to take a nap yesterday and today, I have felt extra tired.

    Next Friday I have to go into work for a twelve hour day to work the party. I have to be “on” for most of those twelve hours so it will be interesting to see how I do. At last year’s party I was eight months into GAPS and feeling a lot better. I am still feeling better than I did before starting GAPS, but still on a quest for more energy.

    I’ve started to take a digestive enzyme Enzymedica Digest Basic (this is my Amazon affiliate link) to see if it helps. It says to take one with every meal. I wonder if I should take one every time I eat? I have been nibbling today and wondered if I should take one every time I eat another little meal.

    Anyway, I have read in more than one place if your stomach doesn’t have the right bacteria or acids to digest it will take much of your energy reserves to digest your food. Digestive enzymes are supposed to help, but I don’t know how long it will take.

    I am continuing to use the bio-identical hormone cremes and I recently learned that for the second jar I will not use the cremes for the first seven days of the month in an attempt to “regulate” my periods. The woman I spoke with on this said if my body has more eggs [affiliate link] to produce then I will begin to have regular periods, if not, she says going through menopause will be easier. I have committed to trying the cremes for four months, so we will see what happens.

    So far I am still feeling calmer, but I do not yet detect more energy levels. It is so hard to keep up with everything… broth, ferments, cod liver oil, liver, etc. It just seems like too much sometimes. But I am still convinced that I will find the recipe for my personal GAPS cake.

    The digestive enzymes were one thing that was recommended by the doctor who prescribed the bio-identical cremes, and he also suggested some B vitamins. I think I may start to supplement those next. I’m trying to do one thing at a time to see what works.

    My air conditioning on my car is broken, and I just had it fixed in March. I am so frustrated by this, and I believe it is also adding to my tiredness. Thankfully my son let me borrow his car on Friday so we were comfortable while driving around to sell raffle tickets.

    I had gotten back to eating a lot of fruit, so I stopped eating fruit on Monday the 18th and had no fruit for three days… then I had a banana on Thursday. And I’ve had some strawberries this weekend that my husband brought home (four pounds!).

    This next week is going to be extra busy and stressful… and the next week will be really stressful at work as we attempt to begin entering our state billings in a brand new system. I will cope well, but I know I will be extra tired as a result. I am trying harder to get to bed in the evening as early as I can. I should be in bed already, but I took a late nap. I’m also very thirsty, I have not had much water to drink today.

    So how are you doing on your GAPS journey?


    GAPS DIET JOURNEY is a participant in the Amazon Services LLC Associates Program, an affiliate advertising program designed to provide a means for sites to earn advertising fees by advertising and linking to AMAZON.COM. GAPS DIET JOURNEY is an affiliate for several companies and may be compensated through advertising and marketing channels. Therefore, this post may contain affiliate links.

  • Day 528 My GAPS Journey

    Just a quick update. My husband was finally home for the evening last night and we got to bed early – at 7:30. I slept until 8:00am! What a lovely night’s worth of sleep. I have been having insomnia every night for the last week, and I am sure I can attribute it to the fruit binge I’ve been on lately. I seem to be in some kind of rebellion and can’t get myself to stop eating fruit. Fruit is okay on GAPS, but it affects my sleep so I need to stay off it until I do some more healing, apparently.

    I am still using the cremes day and night, and I found myself alarmed one day to realize I’m doing something I never thought I would. I have always said I wasn’t going to fight growing old. I won’t take Premarin, I won’t dye my hair, I won’t get plastic surgery. And I’d looked into bio-identical hormones a little bit, enough to have decided I did not want to take them.

    But this is different. My adrenals needing some help to heal is different. I think.

    Well, I have been working at this computer all day long, trying to get caught up in different areas of finance… my husband’s business, our personal budget… and I still have a bit more work to do, and I haven’t made dinner yet, either… last week I worked overtime about eight hours and ended up eating scrambled eggs [affiliate link] for dinner a couple of nights. Thank goodness I like eggs and can tolerate them.

    Today was a good day.

    GAPS DIET JOURNEY is a participant in the Amazon Services LLC Associates Program, an affiliate advertising program designed to provide a means for sites to earn advertising fees by advertising and linking to AMAZON.COM. GAPS DIET JOURNEY is an affiliate for several companies and may be compensated through advertising and marketing channels. Therefore, this post may contain affiliate links.

  • Chicken Liver Pâté

    Chicken Liver Pâté

    Hello all, it has been a super busy week for me. My employer has to fall in line with the state’s new billing system which has meant too many of my hours at work have been drained away with training, preparing files for scanning, meetings and other things that have nothing to do with my normal work tasks.

    On Tuesday and Wednesday I was away from home 14+ hours each day which left precious little time for anything else than a quick shower, putting together super easy dinners and then trying to sleep. Both nights I was so wound up that I had trouble sleeping, even though I was exhausted. I think I got 4 hours sleep on Wednesday night, so Thursday was not the most fun day I’ve had at work. My boss and I got into it a little because I couldn’t stop myself from snapping back after she got snippy with me. We have a good working relationship though and she knows I don’t do well when I don’t sleep and her allergies and IBS were giving her fits so within half an hour everything was back to normal.

    Now, the reason for this post!!! I am a devout liver hater. So when I come up with a recipe for liver that I can tolerate, it’s big! I have hated liver all my life. My first introduction to liver was when my mother remarried when I was nine years old, and my stepfather’s favorite meal in the whole world was beef liver, mustard greens, cornbread and black eyed peas. I can’t think of four more dry foods to put on a plate together. Now if you melted some butter on the cornbread, drizzled some on the mustard greens and black eyed peas and served some onions [affiliate link] with that liver, maybe I could have stomached it, but he liked all those things as they were. No butter. My mom breaded the liver and fried it so it did have a little bit of fat that way.

    And of course my mother couldn’t afford calf liver, so old-gnarly-big-ugly-veined-tough- skin-on-the-edges-adult beef liver it was. Not only did it taste horrible, it was nearly impossible to chew. We used to wear knee high socks and I remember carefully extracting a mouthful from my mouth, into my hand and tucking into the back of my sock, hoping my mom wouldn’t see when I finally asked to be excused from the table.

    A few years later, while living with the foster family, the mother made calves liver one time. Her method was to fill a big pot with oil, boil several sliced onions and then finally boil the calves liver. It was actually tolerable, it tasted halfway decent. It was probably due to it being drowned in fat and onions, and the fact that there were no pieces that could not be chewed.

    Other than that, I never made liver and in fact my husband and I made a pact that we would never even have liver in our home. Haha. Enter Nourishing Traditions and Weston A. Price Foundation.

    I remember for years and years thinking that liver is the detoxifier of our body and therefore the detoxifier of the animals’ body and therefore EWWW!

    But then I started learning how liver is actually very good for us, very beneficial to us and an important traditional nutrient-dense food. So I’ve been trying to reintroduce liver into my diet for about six years.

    I’ve tried cutting it into little bits and swallowing it raw, but didn’t really enjoy working with raw liver all that much, although I did see a blog post at Helladelicious’ last week where the author used kitchen shears to cut the liver into pieces, that might be easier.

    Now I recently became the happy recipient of four packages of grass fed beef liver. Yes, I do mean happy. It was free! Our grass fed meat farmer offers all offal free of charge, and I guess the folks who bought meat this time don’t really like the liver, heart, ox-tails because they were offered up to anyone who wanted them. So I came home with half a heart, the liver and a small package of ox-tails.

    But I haven’t used that liver yet. It’s still sitting in the freezer. I’ve been working on my last batch of chicken livers, which I turned into paté which was actually tolerable, and I was eating two tablespoons of the stuff each day! Yay me!

    Chicken Liver Paté

    My recipe was inspired by my friend over at Set Free. She posted a recipe for Beef Liver Pate with Beef Heart a few weeks ago and I didn’t have beef liver, nor beef heart, nor hamburger, but I did have chicken livers! So I improvised.

    • 1 pound Chicken Livers
    • 1 teaspoon Celtic sea salt [affiliate link]
    • 1/2 teaspoon black pepper [affiliate link]
    • 1 teaspoon basil
    • 1/4 teaspoon ginger [affiliate link]
    • 1/4 teaspoon onion powder
    • 1/4 teaspoon garlic powder [affiliate link]
    • 1/2 teaspoon thyme
    • 1/2 teaspoon sage
    • 4 Tablespoons lard from a bone-in roast cooked in the crockpot
    • 1/2 cup cooked fatty pieces from the bone-in roast
    • 1/2 cup broth from bone-in roast

    I put everything into a skillet and cooked it until the liver was completely done, and the broth was cooked down to almost gone. I let it cool for about 20 minutes then put half of it into my blender and blended it until it was completely mush, and did the same with the second half.

    It had a bit of a pudding texture to it.

    I refrigerated the paté and it thickened nicely. I ate a couple of tablespoons daily until I realized that it might go bad before I could finish it, so I took a tablespoon measuring spoon and sectioned the remaining paté into 1 tablespoon portions.

    Chicken Liver Paté in Tablespoon portions

    This bag contains 15 tablespoons of liver. I placed this bag in the freezer and every day I would take out two tablespoons and allow it to thaw and then eat.

    The taste actually grew less intense each day when I was eating it fresh made, and even less so after freezing. The texture is still something to get used to.

    Now that I have the beef heart and beef liver, and I have some hamburger on hand, maybe I will try the original recipe.

    I do like liverwurst, amazingly.

    What about you, are you in the hate liver or love liver camp?

    [poll id=”2″]

    This recipe is included at Divine Health’s Offal & Odd Bits Challenge recipe link up.

    Recipe: Chicken Liver Pâté
    Author: 
    Recipe type: Appetizer
    Cuisine: Traditional Foods
    Serves: 15 Tablespoons
     
    Ingredients
    • 1 pound Chicken Livers
    • 1 teaspoon Celtic sea salt
    • ½ teaspoon black pepper
    • 1 teaspoon basil
    • ¼ teaspoon ginger
    • ¼ teaspoon onion powder
    • ¼ teaspoon garlic powder
    • ½ teaspoon thyme
    • ½ teaspoon sage
    • 4 Tablespoons lard from a bone-in roast cooked in the crockpot
    • ½ cup cooked fatty pieces from the bone-in roast
    • ½ cup broth from bone-in roast
    Instructions
    1. Place all ingredients into a skillet and cook until liver is completely done, and the broth is almost completely evaporated.
    2. Allow to cool for 20 minutes.
    3. Place half into blender until completely mush.
    4. Remove and blend second half.
    5. It will have a pudding-like texture. Refrigerate until completely chilled.
    6. I like to measure it out in Tablespoon measurements and freeze, removing a tablespoon or two each day to eat.
    Notes
    The taste grows less intense each day when eating fresh, and even less so after freezing.
    GAPS DIET JOURNEY is a participant in the Amazon Services LLC Associates Program, an affiliate advertising program designed to provide a means for sites to earn advertising fees by advertising and linking to AMAZON.COM. GAPS DIET JOURNEY is an affiliate for several companies and may be compensated through advertising and marketing channels. Therefore, this post may contain affiliate links.