Tonight my youngest son asked if I would slice some cabbage for him using my mandolin so he could make himself some cole slaw. He said he would be willing to grill the burgers if I would do that for him.
Of course the cole slaw he was making would not be something I could eat, since it would contain store bought soybean oil laden mayonnaise, and sugar. I don’t even like cole slaw that much but I thought maybe I would make some for myself, too. I asked for his ingredients, and based my recipe on his. Bear in mind these ingredients are all items I just happened to have already on hand, previously prepared.
Ruby Red Sauerkraut Cole Slaw
2 cups or 10 ounces cabbage, shredded thinly (I made mine 1/8″)
6 Tablespoons Ruby Red Sauerkraut (I call it Ruby Red Sauerkraut and it is simply sauerkraut made with red cabbage)
Shred or slice the cabbage. Place in a bowl and add in the other ingredients. Stir and allow to sit for about twenty minutes. Serves four. My son tasted it and said it was pretty good, but he prefers a sweeter cole slaw. He suggested that I add some honey [affiliate link] to sweeten it a bit.
If you read my blog regularly, you will know I have sworn off honey for the time being, so I chose to not take his recommendation, although you may wish to try adding just a small amount of honey if you like your cole slaw to have a sweeter taste.
GAPS DIET JOURNEY is a participant in the Amazon Services LLC Associates Program, an affiliate advertising program designed to provide a means for sites to earn advertising fees by advertising and linking to AMAZON.COM. GAPS DIET JOURNEY is an affiliate for several companies and may be compensated through advertising and marketing channels. Therefore, this post may contain affiliate links.
This is a two-part recipe. To find Part 1, the Cashew Nut Yogurt, I invite you to visit my friend Jessica over at Delicious Obsessions. Jessica is holding a weekly series all year long called 52 weeks of Bad A** Bacteria and I am guest posting at her blog today for Week 13 with my recipe for Cashew Nut Yogurt.
When I first saw this recipe for Cashew Cream, I thought it might work great for yogurt, and then I saw this gorgeous raw cheesecake Raw Cashew Dreamcake and started daydreaming about making a dairy-free cheesecake inspired by these two recipes PLUS some friendly bacteria by way of dairy free yogurt. This recipe is born of those daydreams. 🙂
I’ll warn you ahead of time, this recipe has a lot of steps, but it is worth it. I’m using a new format for recipes, and this will make it easier for you to print out my recipes. Please let me know what you think about it in the comments. I’m going to give instructions with photos step by step but at the bottom you will find the printable recipe format.
16 dates, measuring 1/2 cup, peeled and pitted (if they are not soft and easy to peel, soak overnight in water)
Place crispy pecans [affiliate link] and moist dates into your food processor and pulse for the consistency you like best. You may like bigger chunks of nuts or smaller chunks. Mine looked like this:
I used a 9-Inch Springform Pan for this cheesecake. I traced the circumference of the bottom of the pan onto parchment paper so that I could line the bottom. Press the crust into the pan evenly. Refrigerate.
Blueberry Filling
24 ounces blueberries (I used frozen)
16 dates, measuring 1/2 cup, peeled and pitted
1 cup water
If your blueberries are frozen, rinse them in warm water, drain. Place in a pan, add 1 cup of water, and 16 dates. Bring to a boil and simmer until the mixture reduces to a thick compote – about twenty minutes. The mixture is thick enough when you scrape your spoon on the bottom of the pan and the mixture does not move quickly to fill the area you scraped. It will also have the consistency of thick jam.
Place cashew nut yogurt into a bowl. Add in the lemon juice and mix. Using a mixer or whisk, drizzle in the coconut oil and blend thoroughly.
Place 2-1/2 cups of cashew nut yogurt mixture on top of the crust in the springform pan. Place in freezer for two hours or until layer is solid.
Whisk 3 tablespoons of blueberry filling into the remaining cashew nut yogurt and refrigerate for later use.
When layer is solid, carefully spread blueberry filling (reserving 3 tablespoons if you need to make Blueberry Honey [affiliate link] Sauce). Once the blueberry filling is spread evenly, pour purple layer on top and spread evenly.
Blueberry Honey Sauce
3 Tablespoons Blueberry Filling
6 Tablespoons honey
Mix together to drizzle over individual slices of cheesecake. This is not necessary if your palate is adjusted to GAPS, although non-GAPSters may like the additional sweetener. Use your judgment.
coconut cream harvested from one can of coconut milk [affiliate link]
2 Tablespoons honey, optional
Place coconut cream into a chilled glass or stainless steel bowl (also chill your mixer’s beaters) and whip until fluffy. Drizzle honey in, if desired and whip. Whipped coconut cream is pretty tasty without any sweetener, so again use your own judgment.
Carefully remove the cheesecake from the springform pan.
Last but not least, this optional step. Fill a cake decorating Pastry Bag with the coconut cream. Place in the freezer for about 15 minutes to firm it up just a bit. Decorate the cake as you wish.
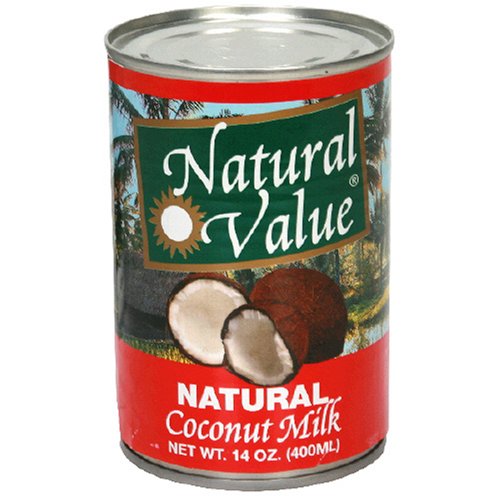
One of my GAPS friends asked about the coconut milk as canned coconut milk is on the “foods to avoid” list for full GAPS. The reason why we should avoid it is because it often contains guar gum. I have found a canned coconut milk that does not contain guar gum. It is the brand name Natural Value Coconut Milk. The next problem is the can lining does contain BPA. Gary, the owner of Natural Value talks about that in a post at his blog. UPDATE: Natural Value canned coconut milk is now in BPA-free cans!
If you wish to avoid the coconut cream altogether, another option for decoration is the Pink Fluff frosting in this post: Pink Blossom Mini Cupcakes. I would omit the cranberry/beets for coloring and just use egg whites and honey.
coconut cream from one can of Natural Value full coconut milk
Instructions
Prepare Cashew Nut Yogurt (see recipe at Delicious Obsessions, link above).
Place can of coconut milk in the refrigerator so that the coconut cream can harden.
Line 9″ springform pan with parchment paper.
Pulse ½ cup of dates and 1-1/2 cups crispy pecans in a food processor.
Press into the bottom of the springform pan.
Cover and refrigerate until needed.
Prepare Blueberry filling, place 24 ounces of blueberries and remaining ½ cup of dates into a pan with 1 cup water.
Bring to a boil and simmer for twenty minutes or until reduced to a thick jam-like consistency.
Place in blender and blend until smooth. You may need to blend and stir frequently until the mixture is completely smooth.
Allow to cool completely.
Place cashew nut yogurt in a bowl, add 4 tablespoons lemon juice and mix.
Using a mixer or whisk, drizzle in melted room temperature coconut oil and blend thoroughly.
Pour 2-1/2 cups of cashew nut yogurt into the springform pan on top of the crust.
Place in freezer for two hours or until layer is solid.
Whisk 3 tablespoons of blueberry filling into remaining cashew nut yogurt to make the purple layer.
If you need to make blueberry honey sauce for people who need their dessert really sweet, set aside 3 tablespoons of the blueberry filling
When bottom layer in freezer is solid, carefully spread blueberry filling layer.
Top with the purple cashew nut yogurt.
Cover and place in the freezer for at least four hours.
Chill a glass or stainless steel bowl, and your mixer’s beaters.
Open the can of coconut milk, remove coconut cream and place in the chilled bowl. Drizzle in 2 tablespoons honey, whip until creamy.
Place in refrigerator.
Make the blueberry honey sauce by adding 3 tablespoons of the blueberry filling to 6 tablespoons of honey and mixing until smooth.
Fill pastry bag with chilled whipped coconut cream.
Decorate the cheesecake as you prefer. You may also dollop whipped coconut cream on each slice instead of decorating.
Allow cheesecake to remain in the freezer for at least four hours before serving.
If cheesecake becomes solidly frozne, remove from freezer at least two hours before serving and allow to sit at room temperature.
Notes
For best results, slice and place individual pieces on plates when the cheesecake has been thawing for one hour. Serve within one hour, or refrigerate.
GAPS DIET JOURNEY is a participant in the Amazon Services LLC Associates Program, an affiliate advertising program designed to provide a means for sites to earn advertising fees by advertising and linking to AMAZON.COM. GAPS DIET JOURNEY is an affiliate for several companies and may be compensated through advertising and marketing channels. Therefore, this post may contain affiliate links.
One of my readers, “Desperate” asked if I could share a video or further explain how to make these squash pancakes. And so, here is a video tutorial for making squash pancakes (my original post is here). These include coconut milk [affiliate link], which I do not recall at the moment if coconut milk is allowed during Introduction, but I hope you will find these video tutorials helpful in preparing these pancakes. I’ve split the tutorial into three videos, so if you want to see how to make the batter, or cook the pancakes you can go directly to that section.
Part 1 of 3 – Making the batter
Part 2 of 3 – Cooking the Pancakes
There is an example in Part 2 of what happens if you try to flip the pancake too soon.
Part 3 of 3 is just a bunch of pancake making going on. About 13 minutes worth, which is 5 or 6 pancakes since each one takes about two minutes to cook.
Place the squash (in the video tutorial I used pumpkin [affiliate link]), peanut butter, coconut milk, cinnamon and egg yolks (reserving the egg whites for later) in your blender (or you may use a stick blender). Blend until thoroughly mixed. I had to pulse a few times, stop the blender and mix the ingredients, pulse again and stop, in order to get everything blended up.
Use a mixer to beat the egg whites until they are stiff and hold a peak.
Begin heating a skillet or griddle medium heat. Place butter, lard or your favorite GAPS friendly fat into the skillet and let it get bubbly.
Fold the egg whites into the batter carefully.
When the skillet is hot, drop about two tablespoons of batter into the skillet (in the videos I used a 1/3 cup measurement which made a larger pancake. Using only two tablespoons will result in smaller pancakes which will be easier to flip if you are new to making these).
When making pancakes, I start with the stove at medium heat (my stove goes from 1 to 10, with 5 being right in the middle and I call that medium heat) and drop batter by the tablespoon. The first batch will help me know if I need to lower the heat, or lessen the amount of batter. By the third or fourth batch I had to lower the heat down to 3 and a half.
Two tablespoons of batter renders 3″ pancakes. In the videos I used 1/3 cup and the pancakes were 4″ to 5″ in diameter.
GAPS DIET JOURNEY is a participant in the Amazon Services LLC Associates Program, an affiliate advertising program designed to provide a means for sites to earn advertising fees by advertising and linking to AMAZON.COM. GAPS DIET JOURNEY is an affiliate for several companies and may be compensated through advertising and marketing channels. Therefore, this post may contain affiliate links.
1 teaspoon onion powder or 1 Tablespoon onion, crushed
1/2 teaspoon salt
1/2 teaspoon pepper
1/2 teaspoon oregano
1/4 teaspoon cayenne, optional
Mix all ingredients together. Form into sausage links. Fry in butter or your favorite healthy fat until well done, turning frequently to brown on all sides, about ten minutes.
You may make these the night before and refrigerate overnight so that the flavors marry.
Quick sausage links that you can throw together in the morning.
Ingredients
1 pound ground meat (whatever you wish: beef, chicken, pork, turkey, you can even hide organ meats!)
½ teaspoon garlic powder or 1 clove garlic, crushed
1 teaspoon onion powder or one Tablespoon onion, crushed
½ teaspoon salt
½ teaspoon pepper
½ teaspoon oregano flakes
¼ teaspoon cayenne, optional
Instructions
Mix all ingredients together.
Form sausage links by rolling in between your hands.
Fry in butter or your favorite healthy fat until well done, turning frequently to brown on all sides, about ten minutes.
Notes
You may make these the night before and refrigerate overnight so that the flavors marry. The links hold together nicely. I thought of being a kid playing with Play-doh as I rolled the links between my hands. :-)
If you love recipes like this, I have two cookbooks you really need to check out ASAP! Beyond Grain and Dairy for gluten-free recipes and Winter Soups
GAPS DIET JOURNEY is a participant in the Amazon Services LLC Associates Program, an affiliate advertising program designed to provide a means for sites to earn advertising fees by advertising and linking to AMAZON.COM. GAPS DIET JOURNEY is an affiliate for several companies and may be compensated through advertising and marketing channels. Therefore, this post may contain affiliate links.
It is super simple to make perfectly scrambled eggs [affiliate link]. There are just a few little secrets you want to follow and you’ll have soft, fluffy eggs every time.
Start with some fresh brown eggs… ideally from your girls out in the yard…
I have all these kitchen helpers, but this morning I chose to use my whisk. Did you know that whisking back and forth works just as well as going round and round?
For each egg, add one teaspoon of butter to a clean skillet. You may also use bacon grease, coconut oil [affiliate link] or any other healthy fat (but not olive oil as it should not be heated). Also, I point out that the skillet should be clean because while cooking eggs in a skillet in which you previously prepared bacon will be delicious, you may find the eggs will brown from the drippings left in the skillet.
For three eggs I added one tablespoon of butter and heated on medium heat until the butter was hot and bubbling.
Don’t wait too long or the butter will start to brown or burn. Pour in the scrambled eggs and immediately using a spatula begin to scrape the eggs from the bottom of the skillet in long strokes. Do this continuously, scraping and turning the eggs until they are completely done.
Once done, remove from the skillet immediately. If you spoon the eggs back into the bowl in which you scrambled them, the small amount of raw egg left in the bowl will be cooked with the heat of the just scrambled eggs.
Your pan should look similar to this when the eggs are removed. Put water into the skillet immediately to facilitate the cleaning process.
And there you have it, beautiful, fluffy scrambled eggs.
Please leave me a comment and let me know, how do you like YOUR eggs?
GAPS DIET JOURNEY is a participant in the Amazon Services LLC Associates Program, an affiliate advertising program designed to provide a means for sites to earn advertising fees by advertising and linking to AMAZON.COM. GAPS DIET JOURNEY is an affiliate for several companies and may be compensated through advertising and marketing channels. Therefore, this post may contain affiliate links.
On January 2nd, I wondered if my leptin was reset and went through the signs Dr. Kruse says you should see if you are leptin sensitive again. 1) I lost 10 pounds, 2) I did notice a change in mood and my sleep did eventually improve, 3) I wasn’t sure about the changes to my sweating pattern, 4) my energy levels were better, but not where I hope they will one day be (is this ALL I get?), 5) cravings completely gone and I’d even been able to skip lunch several days in December which was quite a difference for me, 6) I wasn’t sure if I wake feeling refreshed. So, four out of six ain’t too shabby, right?
However, on January 4th, I decided I was going to continue the leptin reset. This was mostly due in part to getting only 29 grams protein with breakfast and then spending the day feeling hungry. It is so interesting to me how we think something isn’t so bad when we’re coping with it every day, all the time. Like my food cravings, I really didn’t think I was experiencing food cravings prior to the leptin reset. But after being on the leptin reset 8 weeks, and then experiencing food cravings with a vengeance? I was not about to go back to having to fight food cravings all day long, when all it takes is getting 50 grams protein for breakfast to completely annihilate them.
So I decided I would stick with the big protein breakfast, and about midway through January I relaxed on my carbohydrates and also stopped using My Fitness Pal to log every morsel of food going into my mouth. I also stopped trying so hard to eat by 7pm, and decided to eat within an hour of rising (instead of 30 minutes). Throughout the entire time on the leptin reset I have had great difficulty getting to sleep by 10pm – Dr. Kruse says “Lights out by 10pm.” I have tried and tried and tried (and stressed about it), but one of the main reasons I cannot is because my husband interprets that as, “Get into bed at 10pm and as long as the lights are out you can talk and spend time together until 11pm or midnight.” I keep telling him we need to go to bed by 9pm at latest, but just the thought of going to bed that early kills him.
Since for the better part of last year he was not home at night, but instead was out working, I am just thankful he is home almost every night now and tries to make it to bed by 10pm. I have to be thankful for the small things.
I lost 3 pounds in January, in spite of loosening up on the carbs. This, of course, gave me the green light to go hog wild with carbohydrates, woohoo!! I must be doing EVERYTHING right!! Surely I’m leptin sensitive now and the weight is just gonna drop off no matter what I do! Also Valentine’s Day was coming, so I had to have some special goodies to celebrate! 😉
MONTH FOUR – February
I am sure this won’t stick with me because I seem to have selective memory when it comes to carbohydrate consumption. For one thing, it’s like a slippery slope. Wait, let me back up a bit. Before I started GAPS, I had problems eating fruit or sweets alone. I had to be sure to eat them with a meal that had protein, otherwise, eating fruit all by itself would cause me to have an uncomfortable blood sugar drop which resulted in feeling tired, agitated and grumpy. After I had been on GAPS for a few months, my blood sugar normalized and wow, I could have a banana all by itself and not turn into an ogre! Awesome! Back to the slippery slope, I can have a banana one day, and I’m fine. And I think, wow, this is great. So I have another banana the next day, and maybe some peanut butter [affiliate link] with honey [affiliate link]. And then the next day something else, and more the following day. When I have carbohydrates progressively it seems as each day passes I begin to feel morose and start to have a lot of negative thoughts, but I’m not really aware that this is happening. Eventually I’m feeling really depressed, my sleep is affected quite terribly, which I’m then not able to cope with hardly anything, can’t get up to go to work. I’m a basket case.
Throughout February I stuck with the big protein breakfast, but was very loose on my carbohydrates, not paying much attention and eating more vegetables with dinner, and feeling a lack of joy for life, which grew progressively worse.
With this most recent depressive period, I was stuck inside, unable to see clearly what was happening. Everything seems worse when you are depressed. Finally, I realized I had to stop eating the cashew milk yogurt, bananas, honey, nuts and everything else I’d been eating (remember this: Pink Blossom Mini Cupcakes, Coconut Pecan Frosting, Coconut Almond Candy Clusters, incredible lemon curd, chocolate hearts – all GAPS legal, mind you!), and once I did, within 24 hours the depression had lifted noticeably but I was still feeling negative. Within another 24 hours, the negative thinking left also.
I decided I had to get serious about sticking to the leptin reset again, mostly the part where I need to stay low on my carbohydrates. Even now I find myself questioning exactly what happened? Maybe it’s not truly the carbohydrates… maybe it is the nuts in which I was overindulging? All those Omega 6s, not being balanced by enough Omega 3s? Or maybe it’s the raw, unpasteurized, unfiltered honey? Why suspect the honey? Well, our coop manager just learned, after watching the documentary Vanishing of the Bees and calling our honey source, that he uses corn syrup and/or high fructose corn syrup to feed his bees, and allows them to pollinate on crops that are sprayed with pesticides.
It just seems safer to stick to meats, vegetables, fats and limited amounts of carbohydrates for the time. I’m gradually sleeping better, and feeling much more able to cope with life in general. Unfortunately, I have a great deal of stress in my job, mostly because I’m overworked due to additional burdens placed on me by outside vendors and their new billing requirements, but I have no control over this, and we can’t afford to hire additional help so I just need to figure out how to manage the stress which comes with perpetually running around putting out fires after the fact.
I also started the Cold Thermogenesis. I think with going back to the limited carbohydrates, and doing the face immersion into ice water, I am feeling better. I am improving, and I have even been forgetting to use my hydrocortisone. This is a good sign, indicating that I can drop my dosage, which I have. Dr. Kruse says in his post Evolution of the Leptin Rx:
This blog is designed for those who have been previously left out of the the reset protocol. Those people are gastric bypass patients, HCG users, those on exogenous steroids, chronic pain patients, and those with T2D and metabolic syndrome as a few examples.
In the article I’ve linked to explains what exogenous steroid use is, and the use of hydrocortisone to support the adrenals is one.
Now I just need to find the time to read Dr. Kruse’s lengthy, information filled blog posts on Cold Thermogenesis. He also says to be sure to read the comments for “gold nuggets” of information.
Are you doing the Leptin Reset? What about the Cold Thermogenesis? Are you interesting in trying either one or both?
GAPS DIET JOURNEY is a participant in the Amazon Services LLC Associates Program, an affiliate advertising program designed to provide a means for sites to earn advertising fees by advertising and linking to AMAZON.COM. GAPS DIET JOURNEY is an affiliate for several companies and may be compensated through advertising and marketing channels. Therefore, this post may contain affiliate links.