Too much dessert going on around here. I’m gaining weight and I’m not the least bit happy about it! I just keep getting all these fun doodads to use in the kitchen and coming up with so many fun creative recipes and can’t help but want to test them out.
And here’s the thing… it’s abundantly clear to me that I’m feeling good when I’m churning out creations in the kitchen. So it’s not all bad. I just have to use a little more discipline and utilize my Supreme Taste Testers more often (my awesome coworkers).
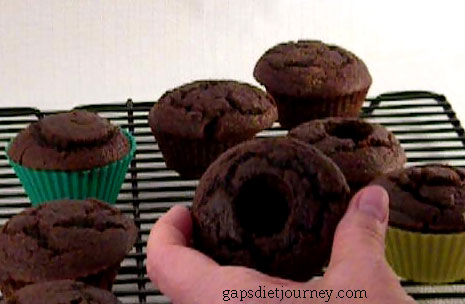
For this batch, I used the Cuisipro Cupcake Corer (Amazon Affiliate Link) create a hole in the top of the cupcake. It works great!!
My husband is the chocolate lover in our home and he loved these.
Without further ado, here’s the recipe.
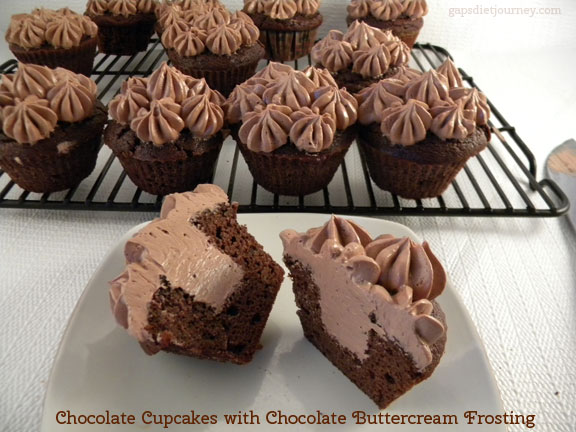
Chocolate Cupcakes
- 8 large whole eggs [affiliate link] (weight 402 grams – without shells)
- 1/2 cup mashed banana (1 small banana)
- 1/2 cup coconut oil*
- 1/2 cup honey*
- 1/2 teaspoon cinnamon [affiliate link]
- 1 teaspoons vanilla (links to my Homemade Vanilla recipe)
- 1/2 cup coconut flour,* packed (weight 87 grams)
- 6 tablespoons cocoa powder [affiliate link]
- 1 teaspoon baking soda [affiliate link]
- Preheat oven to 350°F. Be sure oven is preheated to the correct temperature.
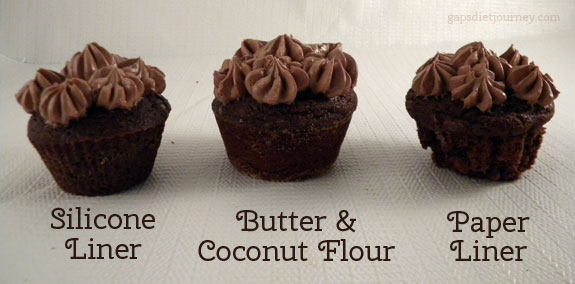
- If you don’t have the silicone baking cups, grease the cupcake tins well and dust with coconut flour [affiliate link].
- If you do have the silicone baking cups, very lightly grease them with butter or coconut.
- In a large mixing bowl, combine eggs, banana, coconut oil [affiliate link], honey [affiliate link], cinnamon, vanilla [affiliate link] and baking soda.
- With an electric mixer, mix at low speed until all ingredients are fully incorporated.
- To measure the coconut flour, pack firmly into the cup measurement and use the back of a straight knife to level the flour even with the top edge of the measuring cup.
- To ensure there are no lumps, sift flour.
- Begin by adding half of the coconut flour into the ingredients. Blend until well mixed and allow to sit for 2 minutes. Add remaining coconut flour to achieve a thick batter. It’s better to add flour in small amounts until you find the correct texture than to compensate by adding more liquids and fats.
- Allow to sit for 2 minutes to allow the coconut flour to absorb liquids. The batter for this loaf will be somewhat thick, but still easy to mix with a spoon.
- Spoon batter immediately into cupcake tin.
- Place in a preheated oven. Bake 35 minutes.
- Cupcakes will feel firm to the touch when done.
Chocolate Buttercream Frosting (makes about 2-1/2 cups, perfect for one batch of cupcakes)
- 1 egg + 1 egg yolk at room temperature
- 6 tablespoons honey*
- 1/2 pound unsalted butter at room temperature
- 1 tablespoon vanilla
- 6 tablespoons cocoa powder
- Remove butter from wrappers and place in a bowl nearby so it’s ready for when you need it. Have a spoon handy as well.
- Beat eggs and yolks until they are forming soft peaks (this is best accomplished by using a stand mixer. While the eggs are beating, heat honey to 240°F in a heavy bottomed saucepan over medium heat. Try to use a pan that has a lip on the edge as I find that easier to hold in place while pouring the honey slowly into the eggs.
- I also like to use a digital thermometer that has a probe. I set it to sound an alarm at 238°F so that I can attend to it and watch for it to reach 240°F so I can take the pan off the burner immediately.
- With mixer on medium high setting, dribble the honey down the edge (now you’ll see why the pan with the lip comes in handy) of the mixer bowl. The reason you want to dribble the honey on the edge of the bowl is because it will cool just slightly which will keep the eggs from curdling. The eggs will be slightly cooked from the hot honey but not enough to pasteurize them so if you are worried about raw eggs, be sure to use eggs from a farmer you trust.
- Once all the honey is dribbled into the mixture, continue to beat until the egg and honey has cooled to room temperature.
- With the mixer on a medium setting, add butter one spoonful (about two tablespoons) at a time.
- The mixture will turn soupy, but just keep adding butter in one spoonful at a time and as you near the last spoonfuls the mixture will emulsify into buttercream frosting!
- Add vanilla and mix well. Add the cocoa powder, mix well. Once the cupcakes have completely cooled, use take a sharp knife and cut a circle in the middle of the cupcake (or use the Cuisipro Cupcake Corer [Amazon Affiliate Link]). Use the tip of the knife to dig out the center, leaving the bottom of the cupcake intact. Pipe frosting into the center of the cupcake, then decorate the top of the cupcake.
- Crumble the cupcake inserts and sprinkle over the top of the piped on frosting for decoration!
The frosting will be enough for one dozen cupcakes.
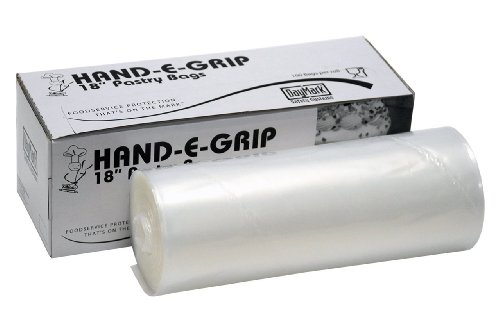
FYI, regarding the frosting, I recently invested in these disposable pastry bags (Amazon Affiliate Link) (I know, I know… disposable? But my “permanent” frosting bag is so hard to clean, seems to have mold in the crease where it’s sewn together and I decided this box would last me practically forever so I went for it.).
The really cool thing is you can just drop your tip into the bag and it fits totally snug. Much better than using a sandwich bag, which is what I was doing.
I also used Ateco #828 Star Pastry Decorating Tip (Amazon Affiliate Link to pipe the frosting into the core of the cupcake, and then piped seven flowers on top, six around the edges and one in the center.
Did you enter for your chance to win one of the sets of the silicone cupcake liners and a copy of my e-book Baking with Coconut Flour? In progress now until November 22nd, 2014.

Did you miss the Pumpkin Spice Cupcakes with the Pumpkin Spice Buttercream Frosting?

If you love desserts like this, I have two cookbooks you really need to check out ASAP! Naturally Sweetened Treats for gluten-free dessert needs and Baker’s Dozen Volume 4, Chocolate Treats for amazing chocolate desserts and snacks.