GAPS Diet Journey Logo

Blog

  • Turkey Stock – The Best Part of Thanksgiving

    Turkey Stock – The Best Part of Thanksgiving

    Turkey Stock

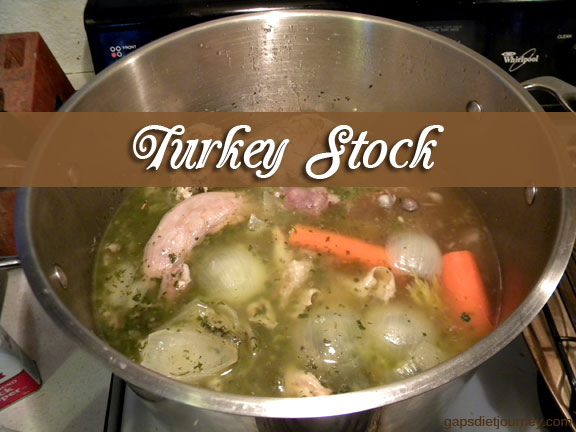
    We’ve been making turkey stock from the Thanksgiving turkey for decades, long before I ever heard of GAPS or Nourishing Traditions. It’s the perfect opportunity to make a large amount of broth, and then we’re set for several batches of soup. I always save the neck, gizzard and heart to add into the stock pot to make broth. I also save any juices left in the pan after the turkey is done baking.

    I’ve recently discovered these awesome Ball Jar Wide Mouth Pint and Half Jars *Amazon Affiliate Link. They are tall without a shoulder and this makes them perfect for using in the freezer! Not only is there less chance of them breaking, but it is so much easier to get broth out of the jar when it isn’t completely thawed!

    I just set the broth into a warm pan of water and leave it and pretty soon there is a thin layer of broth thawed all the way around and pretty soon I can dump the frozen broth right out.

    I’m definitely going to be investing in more of these!

    You’ll also need a large stock pot. I recommend using a 16-Quart Stainless Steel Stockpot *Amazon affiliate link (please don’t use aluminum) with a thick bottom layer. This will help to prevent food from burning. In the past I could only afford to buy the stock pots with the thin bottom and I was burning food all the time.

    You can also make turkey broth in your Instant Pot, but I found that I needed to break the carcass into two pieces and make two separate batches. You could freeze the second half to make broth at a later date.

    Turkey Stock from a Turkey Carcass

    • 1 turkey carcass
    • turkey neck, gizzard and heart
    • 4 ribs celery, preferably with leaves
    • 1 large onion
    • 4 carrots, peeled
    • 1/4 cup parsley [affiliate link] flakes
    • 1 teaspoon sage
    • 8 peppercorns
    • 8 cloves [affiliate link] garlic
    • 1 bay leaf
    1. Remove as much of the meat as you can from the turkey carcass to be used for leftovers, sandwiches, or to be chopped up and place into a pot of soup once the broth is done. Ideally this task is completed following Thanksgiving dinner. Save carcass in the refrigerator or freezer until ready to turn into stock.
    2. Place the turkey carcass in the stock pot.
    3. Add in 4 ribs of celery, cut into 3″ pieces. I like to put the vegetables in big pieces so I can pull them out to save to add to a pot of soup.
    4. Add 1 onion, quartered.
    5. Add four large carrots, peeled and cut into 3″ pieces.
    6. Add parsley flakes, sage, peppercorns and bay leaf.
    7. Add filtered water to cover the carcass and vegetables.
    8. Bring to a boil, then lower heat until simmering.
    9. Cook for several hours until the carcass is falling apart.
    10. Pick out cooked vegetables, reserve for making soup.
    11. Strain broth.
    12. You can use it now to make soup.
    13. For the leftover broth, allow to cool for an hour or two, then refrigerate or freeze.

    Turkey Stock – The Best Part of Thanksgiving
    Author: 
    Recipe type: Turkey Stock for Making Soup
    Cuisine: American
     
    Frugal use of the turkey carcass after the big Thanksgiving Dinner – turn it into a couple gallons of stock for making soup.
    Ingredients
    • 1 turkey carcass
    • turkey neck, gizzard and heart
    • 4 ribs celery, preferably with leaves
    • 1 large onion
    • 4 carrots, peeled
    • ¼ cup parsley flakes
    • 1 teaspoon sage
    • 8 peppercorns
    • 8 cloves garlic
    • 1 bay leaf
    Instructions
    1. Remove as much of the meat as you can from the turkey carcass to be used for leftovers, sandwiches, or to be chopped up and place into a pot of soup once the broth is done. Ideally this task is completed following Thanksgiving dinner. Save carcass in the refrigerator or freezer until ready to turn into stock.
    2. Place the turkey carcass in the stock pot.
    3. Add in 4 ribs of celery, cut into 3″ pieces. I like to put the vegetables in big pieces so I can pull them out to save to add to a pot of soup.
    4. Add 1 onion, quartered.
    5. Add four large carrots, peeled and cut into 3″ pieces.
    6. Add parsley flakes, sage, peppercorns and bay leaf.
    7. Add filtered water to cover the carcass and vegetables.
    8. Bring to a boil, then lower heat until simmering.
    9. Cook for several hours until the carcass is falling apart.
    10. Pick out cooked vegetables, reserve for making soup.
    11. Strain broth.
    12. You can use it now to make soup.
    13. For the leftover broth, allow to cool for an hour or two, then refrigerate or freeze.

    Do you use the turkey carcass to make stock?


    GAPS DIET JOURNEY is a participant in the Amazon Services LLC Associates Program, an affiliate advertising program designed to provide a means for sites to earn advertising fees by advertising and linking to AMAZON.COM. GAPS DIET JOURNEY is an affiliate for several companies and may be compensated through advertising and marketing channels. Therefore, this post may contain affiliate links.

  • Thick Pumpkin Eggnog (Dairy-Free)

    Thick Pumpkin Eggnog (Dairy-Free)

    Thick Pumpkin Eggnog Dairy-Free

    I love creating recipes so much and I wish I had more time because my head is very often full of ideas. Especially around the holidays. I get great enjoyment from recreating recipes and making them grain-free and GAPS legal.

    My sister has settled into having Thanksgiving on the following Friday and I try to make it there even though there’s not much I can eat except the turkey. There were about twenty people in attendance and at least half were twenty-somethings. There was “lite” eggnog to drink at the table, and they were asking what makes it light? One of the guys said it was made with skim milk. I don’t think the commercial producers go that far, I actually think they use 2% instead of whole milk and cream.

    I was telling them how the commercially produced stuff is just weird because it’s so thick and sweet. But that’s all they know, so the lighter version was weird to them.

    In spite of my aversion to the thick eggnog, I’ve wanted to recreate it for those who prefer it.

    I thought pumpkin [affiliate link] would work great to thicken, and this year I actually saw pumpkin eggnog in the store, so I thought this would be a perfect opportunity to combine the two flavors.

    By the way, pumpkin worked wonderfully. You could also use butternut squash or winter squash. The pumpkin I used was a big white flat pumpkin which looked like a turban and it had no sweetness to it whatsoever. I believe this is why I had to use so much honey [affiliate link] to make it sweet. You should add honey one teaspoon at a time to sweeten it to your liking. I’m sure you could also use maple syrup if you prefer (and you are not doing GAPS).

    I happened to have vanilla [affiliate link] made using bourbon whiskey, so I used that instead of my regular homemade vanilla (made with vodka).

    Warning about raw eggs [affiliate link]: If you’re going to have your eggs raw, it’s best to have them from your own hens or from a farmer you trust, rather than using commercially produced eggs. We are lucky to have a few hens who provide us with just enough “safe” (IMO) eggs for making mayonnaise and the occasional eggnog.

    Thick Pumpkin Eggnog Dairy-Free

    2 small servings or 1 large serving

    1. Add coconut milk, pumpkin, egg, vanilla and pinch of sea salt to a blender and mix 1-2 minutes.
    2. Add honey to taste. The pumpkin I used had almost no sweetness to it so if you use butternut squash, you may already have a sweet tasting drink. I used two tablespoons to make it taste nice and sweet.
    3. Grate nutmeg on top.
    4. Serve and enjoy!

    Thick Pumpkin Eggnog (Dairy-Free)
    Author: 
    Recipe type: Holiday
    Cuisine: American
    Serves: 2
     
    Thick eggnog with a pumpkin twist. Honey sweetened and dairy-free.
    Ingredients
    • ¾ cup coconut milk (I used homemade)
    • ½ cup cooked pumpkin, winter squash or butternut squash
    • 1 large whole egg
    • 1 teaspoon regular or bourbon vanilla (make your own using bourbon whiskey instead of vodka)
    • pinch sea salt
    • 2 tablespoons honey (or less)
    • freshly grated nutmeg
    Instructions
    1. Add coconut milk, pumpkin, egg, vanilla and pinch of sea salt to a blender and mix 1-2 minutes.
    2. Add honey to taste. The pumpkin I used had almost no sweetness to it so if you use butternut squash, you may already have a sweet tasting drink. I used two tablespoons to make it taste nice and sweet.
    3. Grate nutmeg on top.
    Nutrition Information
    Serving size: 6 oz

    Save

    If you love desserts like this, I have two cookbooks you really need to check out ASAP! Naturally Sweetened Treats for gluten-free dessert needs and Baker’s Dozen 2 Pumpkin Treats.

    Save

    GAPS DIET JOURNEY is a participant in the Amazon Services LLC Associates Program, an affiliate advertising program designed to provide a means for sites to earn advertising fees by advertising and linking to AMAZON.COM. GAPS DIET JOURNEY is an affiliate for several companies and may be compensated through advertising and marketing channels. Therefore, this post may contain affiliate links.

  • Spiced Caramel Sauce (Honey Sweetened, Dairy-Free)

    Spiced Caramel Sauce (Honey Sweetened, Dairy-Free)

    Spiced Caramel Dip & Topping

    Yesterday I took the Deep Dish Apple Cranberry Pecan Pie to work for our potluck / Secret Santa / Christmas / holiday party. There was just one little problem. It looked too plain. It was beautiful in its own “real food” way, but I knew the top needed to be dressed up, otherwise I’d be bringing most of the pie home myself.

    Deep Dish Apple Cranberry Pecan Pie

    I decided that something was going to be pecans [affiliate link] and caramel. Spiced caramel, to be exact.

    Deep Dish Apple Cranberry Pecan Pie with Spiced Caramel ToppingSpiced Caraamel Topping

    So I went looking on the Internet for some “real food” honey [affiliate link] sweetened caramel. For reference, here are the two I found. My recipe is slightly different than each of these, plus I added in some mulled cider-type spices.

    Spiced Caramel Dip & Topping

    • 1/2 cup honey
    • 1/2 cup full fat coconut milk [affiliate link] (preferably the cream, harvested from the top layer)
    • 2 tablespoons butter
    • 1/2 teaspoon ground allspice [affiliate link]
    • 1/2 teaspoon ground cinnamon [affiliate link]
    • 1/2 teaspoon ground cloves [affiliate link]
    • 1 teaspoon vanilla [affiliate link] (homemade recipe here)
    1. Mix honey, coconut milk and butter in a small heavy bottomed pan. It really helps to have a thermometer for this recipe so that you know when you should take it off the heat.
    2. Bring to a boil and lower heat to simmer until you reach 245°F to 250°F which is the firm ball stage (candy making verbage). This will take at least 25 minutes.
    3. Remove from heat and allow it to cool before adding the other ingredients. You can speed up the cooling process by placing the bottom of the pan in an ice water bath. Remove as it thickens and stir, then place in the ice water to cool further.
    4. Once the syrup has cooled slightly and has begun to thicken, add the vanilla and spices and mix thoroughly.

    Use for dipping apples, making candy, topping ice cream, inside of layers of cake, or on top of pie.

    Deep Dish Apple Cranberry Pecan Pie with Spiced Caramel Topping

    Spiced Caramel Dip & Topping
    Author: 
    Recipe type: Dessert
     
    Caramel topping with mulled cider spices. Delicious for dipping apples, drizzling on ice cream or on top of my Deep Dish Apple Cranberry Pecan Pie.
    Ingredients
    • ½ cup honey
    • ½ cup full fat coconut milk (preferably the cream, harvested from the top layer)
    • 2 tablespoons butter
    • ½ teaspoon ground allspice
    • ½ teaspoon ground cinnamon
    • ½ teaspoon ground cloves
    • 1 teaspoon vanilla
    Instructions
    1. Mix honey, coconut milk and butter in a small heavy bottomed pan. It really helps to have a thermometer for this recipe so that you know when you should take it off the heat.
    2. Bring to a boil and lower heat to simmer until you reach 245°F to 250°F which is the firm ball stage (candy making verbage). This will take at least 25 minutes.
    3. Remove from heat and allow it to cool before adding the other ingredients. You can speed up the cooling process by placing the bottom of the pan in an ice water bath.
    4. Once the syrup has cooled slightly and has begun to thicken, add the vanilla and spices and mix thoroughly.

     
    GAPS DIET JOURNEY is a participant in the Amazon Services LLC Associates Program, an affiliate advertising program designed to provide a means for sites to earn advertising fees by advertising and linking to AMAZON.COM. GAPS DIET JOURNEY is an affiliate for several companies and may be compensated through advertising and marketing channels. Therefore, this post may contain affiliate links.

  • Deep Dish Apple Cranberry Pecan Pie (Grain-Free, Honey Sweetened)

    Deep Dish Apple Cranberry Pecan Pie (Grain-Free, Honey Sweetened)

    Deep Dish Apple Cranberry Pecan Pie

    I was inspired to make this yummy pie after I made the Pear Pecan Pie. I just knew it was going to be a hit and it was perfectly delicious! I must warn you that it is pretty sweet, but the cranberries lend a tart bite and balance out the flavor. [UPDATE: The pie got even sweeter because I decided to top it with 1/2 cup of chopped pecans and this new recipe Spiced Caramel Sauce. If you need to dress up the top of this pie, check out the topping.]

    My niece cooked Thanksgiving dinner this year and did a really great job. She made an incredibly delicious mulled apple cider using honey [affiliate link] and spices. It was amazing and tasty! I drank several ounces of it mixed with sparkling water. I really loved how it tasted and decided to spice up this pie in a similar way.

    Please be aware that you need to use a 9-1/2″ deep dish pie plate to follow this recipe. If you don’t have a deep dish pie plate, it is easy enough to customize the recipe. I’ll share in brackets how much to use for a regular pie plate.

    Use the same amounts for the crust. Just bear in mind that the regular pie crust will have more of an edge than the deep dish.

    Crust

    • 1-1/2 cups blanched almond flour [affiliate link], tamped down and measured with a knife flat across the top of the cup measurement
    • 1/4 teaspoon sea salt [affiliate link]
    • 1 teaspoon cinnamon [affiliate link]
    • 1/4 cup butter, soft and at room temperature
    • ice water

    Pie Filling

    • 4 eggs [affiliate link] [3 if using regular 9-1/2″ pie plate]
    • 1-1/2 cups honey [1 cup]
    • 1-1/2 teaspoon vanilla [affiliate link] [1 teaspoon]
    • 3/4 teaspoon sea salt [1/2 teaspoon]
    • 6 tablespoons melted butter [4 tablespoons]
    • 3/4 teaspoon cinnamon [1/2 teaspoon]
    • 3/4 teaspoon ground allspice [affiliate link] [1/2 teaspoon]
    • 3/4 teaspoon ground cloves [affiliate link] [1/2 teaspoon]
    • 2 apples, peeled, cored and sliced thin [1-1/2 apples]
    • 1 cup cranberries [3/4 cup]
    • 1 cup pecans [affiliate link] [3/4 cup]

    Crust

    1. Measure almond flour, add to a mixing bowl.
    2. Mix in sea salt and cinnamon.
    3. Add soft butter. Mash almond flour and butter together gently with your fingertips, or a fork until it forms crumbly pieces.
    4. Add in a teaspoon of ice water at a time to moisten pie crust. Your goal is to mix lightly with a fork until you have small and some marble sized clumps of dough.
    5. Press into a pie plate. This pie will not have a large crust around the edges, the crust just comes up to the side.

    Pie Filling

    1. Scramble eggs in a mixing bowl (scramble well otherwise you may end up with cooked egg white in your pie filling.
    2. Add honey, vanilla, butter and spices. Mix together and it will form a rich caramel looking sauce.
    3. Add apples, cranberries and pecans into the pie crust.
    4. Pour sauce on top.
    5. Cover crust edges with a pie crust protector, or an aluminum foil lip.
    6. Bake at 350°F until pie filling is set, 35-45 minutes.


    Deep Dish Apple Cranberry Pecan Pie (Grain-Free, Honey Sweetened)
    Author: 
    Recipe type: Dessert
    Serves: 8
     
    Perfect blend of cranberries, apples and pecan make this unique pie both sweet and tart.
    Ingredients
    • Crust
    • 1-1/2 cups blanched almond flour, tamped down and measured with a knife flat across the top of the cup measurement
    • ¼ teaspoon sea salt
    • 1 teaspoon cinnamon
    • ¼ cup butter, soft and at room temperature
    • ice water
    • Pie Filling
    • 4 eggs [3 if using regular 9-1/2″ pie plate]]
    • 1-1/2 cups honey [1 cup]
    • 1-1/2 teaspoon vanilla [1 teaspoon]
    • ¾ teaspoon sea salt [1/2 teaspoon]
    • 6 tablespoons melted butter [4 tablespoons]
    • ¾ teaspoon cinnamon [1/2 teaspoon]
    • ¾ teaspoon ground allspice [1/2 teaspoon]
    • ¾ teaspoon ground cloves [1/2 teaspoon]
    • 2 apples, peeled, cored and sliced thin [1-1/2 apples if using regular 9-1/2″ pie plate]
    • 1 cup cranberries [3/4 cup]
    • 1 cup pecans [3/4 cup]
    Instructions
    1. Crust
    2. Measure almond flour, add to a mixing bowl.
    3. Mix in sea salt and cinnamon.
    4. Add soft butter. Mash almond flour and butter together gently with your fingertips, or a fork until it forms crumbly pieces.
    5. Add in a teaspoon of ice water at a time to moisten pie crust. Your goal is to mix lightly with a fork until you have small and some marble sized clumps of dough.
    6. Press into a pie plate. This pie will not have a large crust around the edges, the crust just comes up to the side.
    7. Pie Filling
    8. Scramble eggs in a mixing bowl (scramble well otherwise you may end up with cooked egg white in your pie filling.
    9. Add honey, vanilla, butter and spices. Mix together and it will form a rich caramel looking sauce.
    10. Add apples, cranberries and pecans into the pie crust.
    11. Pour sauce on top.
    12. Cover crust edges with a pie crust protector, or an aluminum foil lip.
    13. Bake at 350°F until pie is set, 35-45 minutes.
    Notes
    This recipe calls for a deep dish 9½” pie plate. Ingredients in brackets are to accommodate a regular 9½” pie plate.

    Deep Dish Apple Cranberry Pecan Pie

    Here’s a piece with the Spiced Caramel Sauce topping it:

    Deep Dish Apple Cranberry Pecan Pie with Spiced Caramel Topping


    GAPS DIET JOURNEY is a participant in the Amazon Services LLC Associates Program, an affiliate advertising program designed to provide a means for sites to earn advertising fees by advertising and linking to AMAZON.COM. GAPS DIET JOURNEY is an affiliate for several companies and may be compensated through advertising and marketing channels. Therefore, this post may contain affiliate links.

  • Homemade Simple Delicious Eggnog (Dairy-Free)

    Homemade Simple Delicious Eggnog (Dairy-Free)

    Simple Eggnog

    When I was growing up we never had store bought eggnog. Never. Not even once do I remember having it. But my mom made it every year at Christmas. That was back before raw eggs [affiliate link] were considered a dangerous food, and I can see the need for concern, considering the way hens are raised nowadays.

    Insert standard warning about raw eggs: If you’re going to have your eggs raw, best to have them from your own hens or from a farmer you trust, rather than using commercially produced eggs. We are lucky to have a few hens who provide us with just enough “safe” (IMO) eggs for making mayonnaise and the occasional eggnog.

    Back to the eggnog. Buying it for the first time as an adult, I was really confused by the store bought eggnog. It was super thick, almost like a melted shake and super sweet. I used to cut it with regular milk to thin it down.

    The recipe I am about to share tastes very much like the eggnog my mother used to make, and she was given the recipe by her mother. I have modified a recipe I found at allrecipes.com and one of the commenters (Sarah Stone) for this recipe (Easiest Egg Nog) stated that she had been making this eggnog since finding it in an old Home Economics cookbook. I’m thinking maybe that’s where Grandma found it. 🙂

    So this eggnog may not be what you are used to, if you are in the younger generation and have only been exposed to store bought eggnog.

    This eggnog is delicious, slightly sweet and thin, but with a head of foam on top (due to blending).

    And this version is dairy-free, thanks to the use of coconut milk [affiliate link]. Oh, and for the first time ever, I made my own coconut milk! I have been wanting to do that for months, ever since I got my Vitamix. It’s very simple, here is the video I followed from Tropical Traditions.

    In a nutshell, I heated 3 cups of water (just hot not boiling). Then I placed 1-3/4ths cup of Tropical Traditions unsweetened shredded coconut* into my Vitamix (Amazon affiliate link) and 2 cups of water and blended for 3 minutes. Then I strained out the milk using my nut milk bag (Amazon affiliate link), squeezing the bag to get all the milk out. Then I put the pulp back into the blender with the remaining cup of water and blended 2 more minutes. Squeezed and voila! Coconut milk! It was really very simple and tasted so lovely, and not to mention economical! Canned coconut milk has gotten to be so expensive, it’s a hassle to get it and it’s just so much easier to keep shredded coconut on hand.

    I placed it in the refrigerator overnight to see if the cream would rise to the top and thicken like it does in some canned coconut milk, but it didn’t. That’s okay, it’s still delicious.

    Remember that this eggnog will be much thinner and less sweet than commercially produced eggnog.

    Homemade Simple Delicious Eggnog

    Serves 3 to 6

    • 3 cups coconut milk
    • 3 whole eggs
    • 2 tablespoons honey [affiliate link] (more or less to your own preference)
    • 1-1/2 teaspoon vanilla [affiliate link]
    • dash of ground nutmeg [affiliate link]
    1. Place coconut milk, eggs, honey and vanilla into your blender and blend on high speed for 20-30 seconds.
    2. Re-blend after a minute or two for more foam on top.
    3. Pour into individual glasses and sprinkle a pinch of nutmeg over each glass, or grate fresh using a nutmeg (my favorite is to use fresh ground nutmeg)
    4. Serve and enjoy! Refrigerate what you don’t use.
    5. Re-blend before serving to refresh the foam on top.

    Homemade Simple Delicious Eggnog (Dairy-Free)
    Serves: 6
     
    Ingredients
    • 3 cups coconut milk
    • 3 eggs
    • 2 tablespoons honey (more or less to your own preference)
    • 1-1/2 teaspoon vanilla
    • dash of ground nutmeg
    Instructions
    1. Place coconut milk, eggs, honey and vanilla into your blender and blend on high speed for 20-30 seconds.
    2. Re-blend after a minute or two for more foam on top.
    3. Pour into individual glasses and sprinkle a pinch of nutmeg over each glass, or grate fresh using a nutmeg (my favorite is to use fresh ground nutmeg)
    4. Serve and enjoy! Refrigerate what you don’t use.
    5. Re-blend before serving to refresh the foam on top.

    Save

    If you love desserts like this, I have two cookbooks you really need to check out ASAP! Everyone Loves Pudding and Naturally Sweetened Treats.

    Let me know in the comments what you think about eggnog!

    Save

    Save

    GAPS DIET JOURNEY is a participant in the Amazon Services LLC Associates Program, an affiliate advertising program designed to provide a means for sites to earn advertising fees by advertising and linking to AMAZON.COM. GAPS DIET JOURNEY is an affiliate for several companies and may be compensated through advertising and marketing channels. Therefore, this post may contain affiliate links.

  • Faux Cornbread Dressing Poppers (Grain-Free, Corn-Free)

    Faux Cornbread Dressing Poppers (Grain-Free, Corn-Free)

    Faux Cornbread Dressing Poppers

    You’ll never guess where the inspiration from this recipe came so I’ll tell you… my husband and I were shopping at Fry’s Marketplace, which is a Kroger brand store and in the advertisement they showed a photo of Dressing Balls. I had never heard or thought of such a thing! I checked out the recipe, and it used package stuffing mix, of course.

    I thought they looked pretty yummy though, so I decided I would try and make a coconut flour [affiliate link] version. And I decided to call them poppers, instead of balls.

    Faux Cornbread Dressing Poppers

    Recipe makes 32-36 poppers

    • 5 large whole eggs [affiliate link] (249 grams)
    • 1/2 cup butternut squash
    • 1/2 cup coconut oil [affiliate link], melted
    • 2 tablespoons honey [affiliate link]
    • 1/2 cup coconut flour, packed (84 grams)
    • 3/4 teaspoon sea salt [affiliate link]
    • 1/2 teaspoon baking soda [affiliate link]
    • 1/4 teaspoon poultry seasoning
    • 1/2 cup broth
    • 1/2 cup butter
    • 1 cup celery, diced
    • 1 cup onion, diced
    • 4 eggs
    • 2 teaspoons dried parsley [affiliate link]
    • 1/2 teaspoon sea salt
    • 1/2 teaspoon black pepper [affiliate link]

    Directions

    1. Preheat oven to 350°F.
    2. Grease a large cookie sheet or casserole and line with parchment paper. This will be a flat layer of cornbread, about 1/2″ in height.
    3. Place 2 eggs and 1/2 cup butternut squash into your blender. Process until completely smooth.
    4. Place the mixture into a large mixing bowl. Add the remaining eggs, melted coconut oil, honey, sea salt, baking soda, poultry seasoning and 1/2 cup broth. Mix on low until combined.
    5. To measure the coconut flour, pack firmly into the cup measurement and use the back of a straight knife to level the flour even with the top edge of the measuring cup.
    6. To ensure there are no lumps, sift coconut flour.
    7. Add coconut flour to the batter and mix.
    8. Immediately pour the batter onto the cookie sheet and place in the preheated oven.
    9. Bake for 20-25 minutes. While the cornbread is baking, melt 1/2 cup butter or your favorite GAPS friendly fat into a skillet. Add celery and onion, sauté for 20 minutes.
    10. The cornbread will be firm to the touch and if you lift a corner of the parchment paper you will see that it is nicely browned on the bottom.
    11. Remove from oven and allow to cool for 15 minutes.
    12. Break up bread with a fork until it is in small crumbled pieces.
    13. Return to oven for 15 minutes (this is to dry out the crumbled pieces just a little).
    14. Remove from oven and allow to cool.
    15. Add celery and onion, parsley, salt and pepper.
    16. Scramble four eggs in a large mixing bowl.
    17. Add dressing into the eggs and lightly mix using a fork.
    18. I used a tablespoon scoop to measure each popper.
    19. Lightly press the popper with your hands to form a ball.
    20. Place on a greased cookie sheet and bake for 15 minutes at 350°F.
    21. Remove from oven and place around the turkey for decoration.

    Faux Cornbread Dressing Poppers (Grain-Free, Corn-Free)
    Author: 
    Serves: 32
     
    Ingredients
    • 5 large whole eggs (249 grams)
    • ½ cup butternut squash
    • ½ cup coconut oil, melted
    • 2 tablespoons honey
    • ½ cup coconut flour, packed (84 grams)
    • ¾ teaspoon sea salt
    • ½ teaspoon baking soda
    • ¼ teaspoon poultry seasoning
    • ½ cup broth
    • ½ cup butter
    • 1 cup celery, diced (about 2 stalks)
    • 1 cup onion, diced (about 1 medium onion)
    • 4 eggs
    • 2 teaspoons dried parsley
    • ½ teaspoon sea salt
    • ½ teaspoon black pepper
    Instructions
    1. Preheat oven to 350°F.
    2. Grease a large cookie sheet or casserole and line with parchment paper. This will be a flat layer of cornbread, about ½” in height.
    3. Place 2 eggs and ½ cup butternut squash into your blender. Process until completely smooth.
    4. Place the mixture into a large mixing bowl. Add the remaining eggs, melted coconut oil, honey, sea salt, baking soda, poultry seasoning and ½ cup broth. Mix on low until combined.
    5. To measure the coconut flour, pack firmly into the cup measurement and use the back of a straight knife to level the flour even with the top edge of the measuring cup.
    6. To ensure there are no lumps, sift coconut flour.
    7. Add coconut flour to bowl and mix.
    8. Immediately pour the batter onto the cookie sheet and place in the preheated oven.
    9. Bake for 20-25 minutes. While the cornbread is baking, melt ½ cup butter or your favorite GAPS friendly fat into a skillet. Add celery and onion, saute for 20 minutes.
    10. The cornbread will be firm to the touch and if you lift a corner of the parchment paper you will see that it is nicely browned on the bottom.
    11. Remove from oven and allow to cool for 15 minutes.
    12. Break up bread with a fork until it is in small crumbled pieces.
    13. Return to oven for 15 minutes (this is to dry out the crumbled pieces just a little).
    14. Remove from oven and allow to cool.
    15. Add celery and onion, parsley, salt and pepper.
    16. Scramble four eggs in a large mixing bowl.
    17. Add dressing into the eggs and lightly mix using a fork.
    18. I used a tablespoon scoop to measure each popper.
    19. Lightly press the popper with your hands to form a ball.
    20. Place on a greased cookie sheet and bake for 15 minutes at 350°F.
    21. Remove from oven and place around the turkey for decoration.


    Save

    If you love recipes like this, I have two cookbooks you really need to check out ASAP! Savory Quick Breads and Mastering the Art of Baking With Coconut Flour.

    Save

    GAPS DIET JOURNEY is a participant in the Amazon Services LLC Associates Program, an affiliate advertising program designed to provide a means for sites to earn advertising fees by advertising and linking to AMAZON.COM. GAPS DIET JOURNEY is an affiliate for several companies and may be compensated through advertising and marketing channels. Therefore, this post may contain affiliate links.