Before we start, yes, you can have chocolate on GAPS. Dr. Natasha says, “I find that many people can start having it occasionally on the Full GAPS Diet, once the digestive symptoms are gone.”
I’ve never been much of a fudge lover. I think that’s because most fudge is usually way too sweet. I mean, you may as well eat sugar from the spoon, sweet. Or maybe even worse than that. Maybe drinking warm honey [affiliate link] from the honey bear bottle (Amazon affiliate link). No wait, that’s something my husband did as a child. I digress… and there’s really no point in hashing over exactly how sweet fudge eaten in the past tastes because now I have a healthier fudge to eat.
I’ll be honest with you… this is still pretty doggone sweet. You may be able to get by with less honey, you could definitely try and see how it tastes with only a tablespoon or less.
This fudge contains healthy fats. If you can’t have butter, feel free to substitute with coconut oil [affiliate link]. It is something you can feel good about having once in awhile to tame your chocolate cravings. I used a 7″ x 5″ dish so you could easily yield 35 servings if you cut the fudge into 1″ square pieces.
The texture for this recipe before chilling will be similar to frosting. It will harden up very nicely in the refrigerator or freezer.
Please note the items with asterisks below are affiliate links to the products I use from Tropical Traditions. If you are a new customer and purchase using my link, I will receive a discount coupon and you will receive a copy of their book Virgin Coconut Oil: How It Has Changed Lives and How It Can Change Yours.
GAPS DIET JOURNEY is a participant in the Amazon Services LLC Associates Program, an affiliate advertising program designed to provide a means for sites to earn advertising fees by advertising and linking to AMAZON.COM. GAPS DIET JOURNEY is an affiliate for several companies and may be compensated through advertising and marketing channels. Therefore, this post may contain affiliate links.
Fall is right around the corner. And that means apples are in season. When I was growing up there were just a few varieties of apples available. I can recall Red Delicious, Yellow Delicious, and Granny Smith. I never cared much for Granny Smith’s as they were too tart. Of course nowadays we have so many varieties with interesting names like Honeycrisp, Fuji and Gala, and so many more.
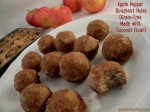
When I saw that apples were on sale, of course I had to buy several pounds. Maybe I could make apple butter (one of my mom’s specialties)… and then I wondered if my Pumpkin Poppers would convert to an apple version. The answer is a resounding yes! These little faux doughnut holes are yummy!
Like the Pumpkin [affiliate link] Poppers they freeze well. Just remember to give them a couple of hours to defrost at room temperature.
Oh, and one more thing: These are dairy-free, but of course butter is legal on GAPS. If you do not have to avoid butter, you may want to substitute the cinnamon [affiliate link] topping mixture with butter instead of coconut oil [affiliate link]. It is quite delicious.
Yields: 22-24 (one of my recipe testers yielded only 17 poppers from two separate batches)
If you have applesauce on hand, go ahead and use it. If you are making your own, there are a few extra steps, but well worth it, in my opinion!
Applesauce Recipe
1-1/2 pounds apples (I used Honeycrisp)
2 tablespoon coconut oil
2 tablespoons water
Wash and core your apples, slice into thin pieces (it’s not necessary to peel).
Place coconut oil and water into a saucepan with a thick bottom.
Add apples.
Cover and cook for 15 minutes.
Remove lid.
Cook 5 minutes longer or until liquid completely reduces.
Cool apples, then add to a blender to make pureed apple.
Measure out 1 cup of applesauce for this recipe.
Apple Poppers Doughnut Holes
Be sure to get an exact 1/2 cup of coconut flour by using the back of a straight edged knife to level off the flour even with the top edge of the measuring cup. Measure all dry ingredients (coconut flour down to cardamom) in a large mixing bowl. If you freeze your coconut flour (like I do with mine to keep it moist and fresh), you may sift after measuring to make sure there are no little hard clumps.
Mix together.
Add eggs, applesauce, coconut oil and honey to the dry ingredients.
Using a hand mixer, blend for 1-2 minutes until completely mixed. As the coconut flour absorbs the liquids the mixture will go from a very runny consistency to a thicker consistency. (This photo is from the Pumpkin Poppers but shows what the texture should look like). Add one tablespoon of coconut flour at a time until the batter has thickened. Note that it will still be very soft in texture, but it won’t be runny.
Allow the batter to sit for 5 minutes so that the coconut flour can absorb the liquids.
Preheat oven to 325°F.
Use coconut oil to grease a mini muffin tin.
Lightly sprinkle coconut flour into the bottom of each muffin cup.
Measure out two tablespoons of batter for each popper. I have one of these and they make the job MUCH easier. Instead of having to meld two tablespoons together I just scoop and drop into the mini muffin tins: Norpro 703 Grip-EZ 2-Tablespoon Stainless Scoop.
The batter should be of the consistency where you can pick it up in your hands and form into a little ball. If you have to use a tablespoon measurement, be sure that you completely meld the two parts together, otherwise when they bake you will end up with little splits and fissures where you placed them together. If by chance your batter is not thick enough, add in coconut flour by the teaspoon waiting a minute or two in between adding more.
Drop into the muffin tins. I don’t advise using cupcake papers for this recipe – in the last step you will drizzle a liquid cinnamon topping which will make a sticky mess of the papers so it is best to just put them bare naked into the muffin tin.
Bake for 20 minutes.
For the topping mix 2 tablespoons melted coconut oil (or butter) with 2 tablespoons honey and 1 teaspoon ground cinnamon.
When the poppers are done, as soon as you remove them from the oven using a 1/4 teaspoon measuring spoon drizzle 1/4 teaspoon of the topping mixture on each popper.
The topping will melt into the popper and will also spill down and soak into the bottom.
Carefully remove each popper by sliding a butter knife in between the popper and the muffin tin. They should not stick because of the coconut flour placed under each one but I had a couple that were still a little stubborn and didn’t want to come loose.
Please let me know if you have any questions, comments or suggestions!
Would you like to learn more about Baking with Coconut Flour? Would you like to know:
How to successfully reproduce other people’s recipes?
How to work with coconut flour?
How to adapt your favorite family recipes?
The steps I take to convert recipes (including a work sheet)?
How to troubleshoot your flops and how to use your flops so that you don’t waste expensive ingredients?
The results of my experiment where I compared three different brand-name coconut flours?
Sources for finding coconut flour, including my favorite?
Why you might want to use coconut flour?
Baking with Coconut Flour will answer all these questions and will teach you how to use this unique flour to make delicious and nutritious baked goods that your friends and family will love.
Apple Poppers Doughnut Holes Gluten Free Grain Free
Serves: 22
Ingredients
½ cup coconut flour, firmly packed (I use Tropical Traditions brand)**
½ teaspoon sea salt
1-1/2 teaspoons ground cinnamon
¾ teaspoon nutmeg
¼ teaspoon ground cardamom
3 eggs
1 cup applesauce (if you are making your own, you will need 1-1/2 pounds of apples)
⅓ cup coconut oil (I use Tropical Traditions Gold Label Organic Virgin Coconut Oil
¼ cup honey (I use Tropical Traditions certified organic, raw honey)
Instructions
If you have applesauce on hand, go ahead and use it. If you are making your own, there are a few extra steps, but well worth it, in my opinion!
Applesauce Recipe
/2 pounds apples (I used Honeycrisp)
tablespoon coconut oil
tablespoons water
Wash and core your apples, slice into thin pieces (it’s not necessary to peel).
Place coconut oil and water into a saucepan with a thick bottom.
Add apples. Cover and cook for 15 minutes.
Remove lid. Cook 5 minutes longer until liquid completely reduces.
Cool apples, then add to a blender to make pureed apple.
Measure out 1 cup of applesauce for this recipe.
Apple Poppers Doughnut Holes
Be sure to get an exact ½ cup of coconut flour by using the back of a straight edged knife to level off the flour even with the top edge of the measuring cup. Measure all dry ingredients (coconut flour down to cardamom) in a large mixing bowl. If you freeze your coconut flour (like I do with mine to keep it moist and fresh), you may sift after measuring to make sure there are no little hard clumps.
Mix together.
Add eggs, applesauce, coconut oil and honey to the dry ingredients.
Using a hand mixer, blend for 1-2 minutes until completely mixed. As the coconut flour absorbs the liquids the mixture will go from a very runny consistency to a thicker consistency. (See photos for consistency)
Add one tablespoon of coconut flour at a time until the batter has thickened. Note that it will still be very soft in texture, but it won’t be runny.
Allow the batter to sit for 5 minutes so that the coconut flour can absorb the liquids.
Preheat oven to 325°F.
Use coconut oil to grease a mini muffin tin.
Lightly sprinkle coconut flour into the bottom of each muffin cup.
Measure out two tablespoons of batter for each popper. I have one of these and they make the job MUCH easier. Instead of having to meld two tablespoons together I just scoop and drop into the mini muffin tins: Norpro 703 Grip-EZ 2-Tablespoon Stainless Scoop.
The batter should be of the consistency where you can pick it up in your hands and form into a little ball. If you have to use a tablespoon measurement, be sure that you completely meld the two parts together, otherwise when they bake you will end up with little splits and fissures where you placed them together. If by chance your batter is not thick enough, add in coconut flour by the teaspoon waiting a minute or two in between adding more.
Drop into the muffin tins. I don’t advise using cupcake papers for this recipe – in the last step you will drizzle a liquid cinnamon topping which will make a sticky mess of the papers so it is best to just put them bare naked into the muffin tin.
Bake for 20 minutes.
For the topping mix 2 tablespoons melted coconut oil (or butter) with 2 tablespoons honey and 1 teaspoon ground cinnamon.
When the poppers are done, as soon as you remove them from the oven using a ¼ teaspoon measuring spoon drizzle ¼ teaspoon of the topping mixture on each popper.
The topping will melt into the popper and will also spill down and soak into the bottom.
Carefully remove each popper, they should not stick because of the coconut flour placed under each one but I had a couple that were still a little stubborn and didn’t want to come loose.
GAPS DIET JOURNEY is a participant in the Amazon Services LLC Associates Program, an affiliate advertising program designed to provide a means for sites to earn advertising fees by advertising and linking to AMAZON.COM. GAPS DIET JOURNEY is an affiliate for several companies and may be compensated through advertising and marketing channels. Therefore, this post may contain affiliate links.
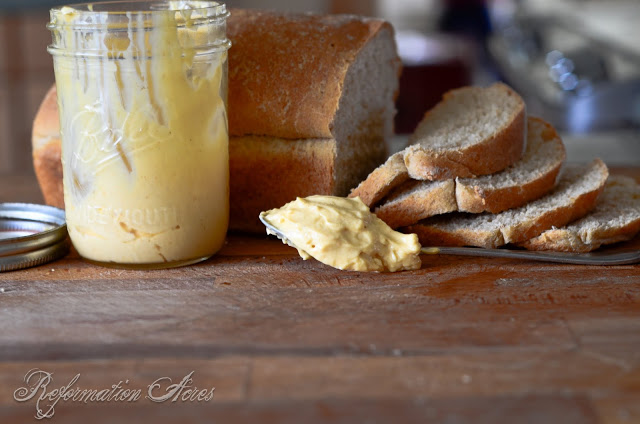
I just learned a brand new tip for making mayonnaise!! I was using my stick blender and the mayonnaise came out soupy. Again. It thickens slightly after chilling, so I wasn’t too worried about it, but my brain started whirring and I was thinking about how there are egg whites in the recipe I use, and how the whites are almost certainly being whipped to some extent and then I wondered if my stick blender was on low or high speed. It turns out that it was on low speed… so I turned it to high and started to pulse the soupy mayonnaise and voilà! What was soupy turned thick and creamy!
Today I have a roundup of mayonnaise recipes. Please note that I have not vetted each and every recipe for its GAPS legal status, so please double check ingredients. All of these recipes are; however, from real food bloggers so you should find them all using healthy real food ingredients.
GAPS DIET JOURNEY is a participant in the Amazon Services LLC Associates Program, an affiliate advertising program designed to provide a means for sites to earn advertising fees by advertising and linking to AMAZON.COM. GAPS DIET JOURNEY is an affiliate for several companies and may be compensated through advertising and marketing channels. Therefore, this post may contain affiliate links.
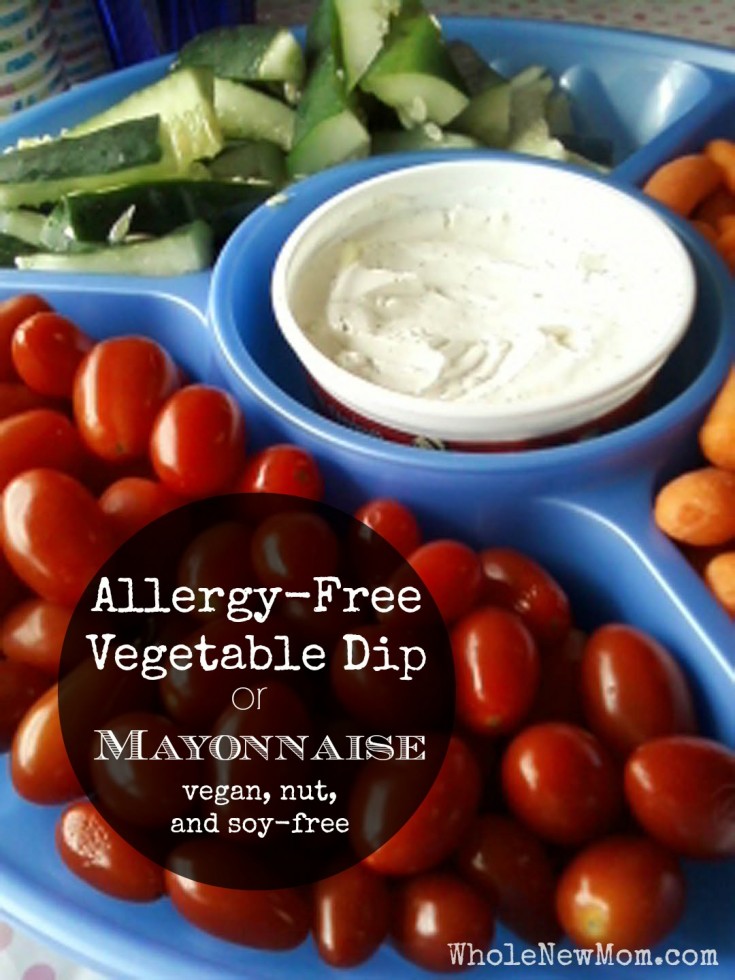
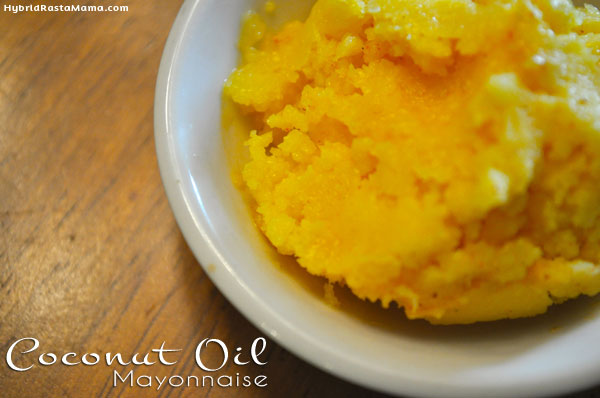
Mayonnaise is a magical food. I say that because I absolutely love how eggs [affiliate link] and oil and an acid mix together and become something so creamy and delicious.
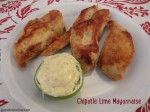
My husband found a chipotle mayonnaise on sale at the store which was free after using a coupon but of course it contained icky things like soybean oil and other weird stuff. It was because of that mayonnaise however, that I decided to try making my own. It has become our new favorite mayonnaise.
Place all ingredients except for the chipotle powder into a tall jar in the order listed.
Using a stick blender, slowly pulse repeatedly until ingredients begin to emulsify. When the mixture is mostly white and creamy you can move the stick blender around a little faster.
After the mayonnaise is done, you can add extra lime juice if you wish a tarter flavor to your mayonnaise. Adding more lime juice will make the mayonnaise thinner.
You’ll need to add chipotle powder to your personal liking. The mayonnaise reduces the heat significantly, so you may be able to add more than you normally would.
What I like to do is to remove a portion of the mayonnaise that I know we’ll use for the meal, and flavor it and leave the rest plain. So I might take 1/2 cup of mayonnaise and add 1 teaspoon chipotle powder, taste and see how I like it.
Place all ingredients except for the chipotle powder into a tall jar in the order listed.
Using a stick blender, slowly pulse repeatedly until ingredients begin to emulsify. When the mixture is mostly white and creamy you can move the stick blender around a little faster.
After the mayonnaise is done, you can add extra lime juice if you wish a tarter flavor to your mayonnaise. Adding more lime juice will make the mayonnaise thinner.
You’ll need to add chipotle powder to your personal liking. The mayonnaise reduces the heat significantly, so you may be able to add more than you normally would.
GAPS DIET JOURNEY is a participant in the Amazon Services LLC Associates Program, an affiliate advertising program designed to provide a means for sites to earn advertising fees by advertising and linking to AMAZON.COM. GAPS DIET JOURNEY is an affiliate for several companies and may be compensated through advertising and marketing channels. Therefore, this post may contain affiliate links.
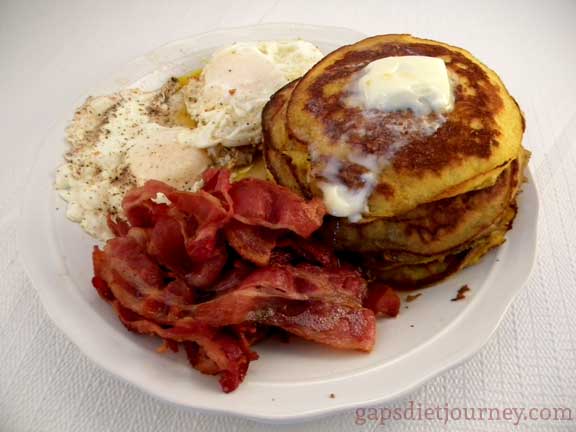
All right, bit of a private joke there but I couldn’t think of a good name for these pancakes and I thought that would work great. I’m trying to persuade my dear husband to try GAPS for just one month and his latest food crush has been raspberry filled doughnuts. My mom hasn’t had doughnuts or pancakes for years, maybe even decades so this morning after eating one of these pancakes she pronounced them better than doughnuts! 🙂 Of course my husband begged to differ, although he did say that the next time I make them he’d like to have three, instead of only one (when I offered them to him he said he didn’t really like pancakes and would just take one).
This is my first created from scratch pancake recipe, I’ve always either used a recipe as it was written, or modified one that I thought would do well after revision. And of course there are the GAPS Squash Pancakes which I demonstrated making in two videos. I had pureed butternut squash on hand and a hankering for pancakes and now I have a new pancake recipe! These turned out really nice.
They hold up well during the cooking process and are golden brown. Just beautiful and so delicious.
When the griddle is nice and hot (butter will be bubbly), place 1/4 cup of batter onto the griddle and smooth into a circle.
Allow to bake on one side until bubbles begin forming and popping. You can use your spatula to flip up the edge to check and make sure the pancake is browning.
Once you flip the pancake cut slits into the top in 2-3 places so the pancake cooks faster. The second side always takes less time to cook than the first side.
Whisk eggs until thoroughly scrambled. Add other ingredients and whisk thoroughly.
Heat your griddle, I use a cast iron griddle. Use plenty of butter or coconut oil before putting batter onto it.
When the griddle is nice and hot (butter will be bubbly), place ¼ cup of batter onto the griddle and smooth into a circle.
Allow to bake on one side until bubbles begin forming and popping. You can use your spatula to flip up the edge to check and make sure the pancake is browning.
Once you flip the pancake cut slits into the top in 2-3 places so the pancake cooks faster. The second side always takes less time to cook than the first side.
GAPS DIET JOURNEY is a participant in the Amazon Services LLC Associates Program, an affiliate advertising program designed to provide a means for sites to earn advertising fees by advertising and linking to AMAZON.COM. GAPS DIET JOURNEY is an affiliate for several companies and may be compensated through advertising and marketing channels. Therefore, this post may contain affiliate links.
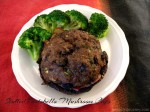
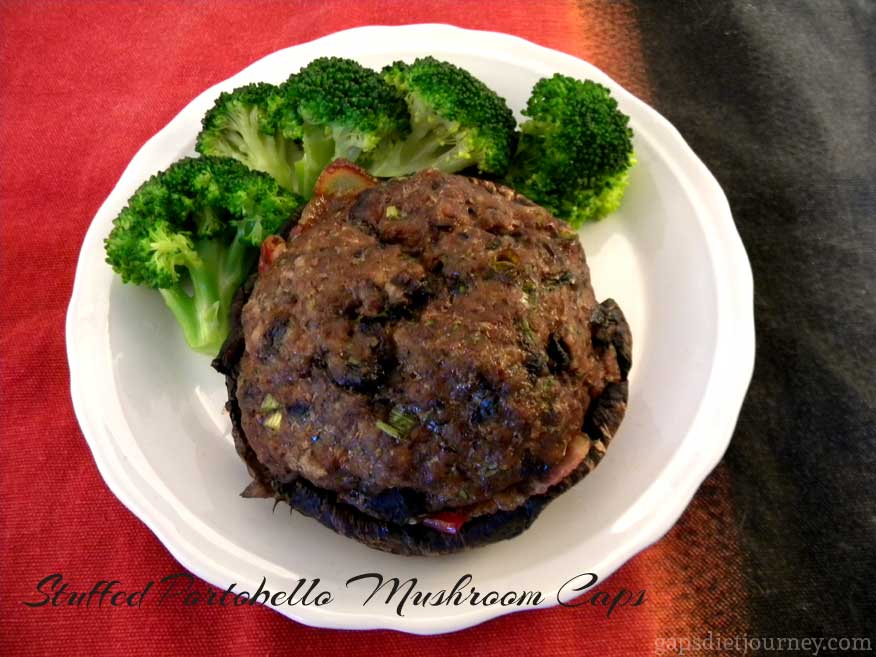
I hate it when I spell words wrong. My earliest memory of being shocked to learn I was spelling a word wrong was when I was in my early twenties and one day discovered that I had been spelling spaghetti for my entire life without the “h”. I’m pretty sure my mom spelled it that way and it was constantly on our dinner menu.What I hate even worse is when words don’t have a proper way to be spelled, where even the dictionary says you can spell it different ways (blasphemous!). Which leads me to this post, and how does one spell portobello? Or is it portabella? WordPress’ spell check indicates either way is wrong, so I had to look it up. I’m still confused! Merriam-Webster prefers portobello, but lists portobella and portabella as variants. It frustrates me to discover that words can be spelled in different ways. When I was going to school, words were spelled one way and that was that. No grey areas, just nice black and white. But I digress…
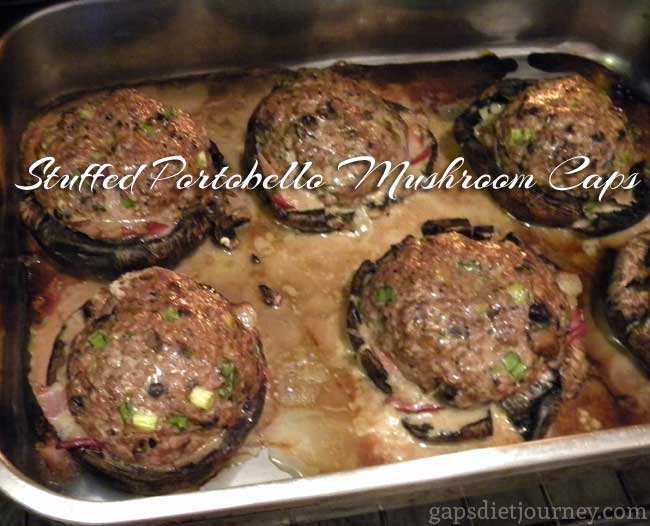
Several nights ago my husband came home with several packages of mushrooms. And by several, I mean a dozen. He does love bargain shopping and was thrilled to be in the right place at the right time to be able to buy 1 pound packages of mushrooms marked down to just $0.99 per package. Of course they needed to be used soon so I threw together this recipe and these turned out wonderfully.
If you love recipes like this, I have two cookbooks you really need to check out ASAP! Beyond Grain and Dairy for gluten-free recipes and Winter Soups.
Save
Save
Save
Save
GAPS DIET JOURNEY is a participant in the Amazon Services LLC Associates Program, an affiliate advertising program designed to provide a means for sites to earn advertising fees by advertising and linking to AMAZON.COM. GAPS DIET JOURNEY is an affiliate for several companies and may be compensated through advertising and marketing channels. Therefore, this post may contain affiliate links.


 I just learned a brand new tip for making mayonnaise!! I was using my stick blender and the mayonnaise came out soupy. Again. It thickens slightly after chilling, so I wasn’t too worried about it, but my brain started whirring and I was thinking about how there are egg whites in the recipe I use, and how the whites are almost certainly being whipped to some extent and then I wondered if my stick blender was on low or high speed. It turns out that it was on low speed… so I turned it to high and started to pulse the soupy mayonnaise and voilà! What was soupy turned thick and creamy!


 Mayonnaise is a magical food. I say that because I absolutely love how