GAPS Diet Journey Logo

Blog

  • Recipe Review: Urban Poser White Wine & Pecan Cashew Cheese Ball

    Recipe Review: Urban Poser White Wine & Pecan Cashew Cheese Ball


    Urban Poser White Wine & Pecan Cashew Cheese Ball

    I saw this recipe at Urban Poser’s, White Wine & Pecan Cashew Cheese Ball and I just had to try it. Jenni said to use any probiotic capsule you have on hand and I asked her in the comments if she thought I could use yogurt starter, this is the one I use: GI Health Pro Yogurt Starter.

    I followed her recipe pretty closely, except:

    1. I doubled the recipe
    2. I had no white wine (she said use white wine or water in the recipe)
    3. I had no chives, so I used green onions [affiliate link]
    4. I only had half as many pecans [affiliate link] on hand
    5. I sauteed the onions in expeller produced coconut oil [affiliate link] instead of olive oil
    6. I didn’t notice the instruction to drip the cheese if it was too wet so I ended up dehydrating after the fact
    7. I used 1/8 teaspoon of GI Health Pro Yogurt Starter

    Most of the time I tweak recipes because I don’t have the exact ingredients on hand, and that was the case this time as well.

    Here are photos of the process I followed.

    Okay, so here’s the cashews blended until creamy, with the Yogurt Starter and the coconut oil. It’s pretty warm here now, so I started this out on the porch on the dryer wrapped in towels. I baked cookies then left the oven light on and before I went to bed I moved the cashew cream into the oven where it remained until 9am the next morning. I fermented for 14 hours.

    The cashew "cheese" fermenting

    Here is the cashew cream the next morning. It had a slight crust on top. I soaked 2 cups of cashews, instead of the one cup in Jenni’s recipe.

    The morning after fermentation

    You can see on the side that some fermentation has indeed occurred (see the bubbles and the product has slightly risen).

    The morning after fermentation

    I happened to have shallots on hand, given to me by our cook at work. I’ve had them for a few weeks so they were getting kind of dehydrated but I had enough for the two tablespoons called for (since I was doubling the recipe). Next you can see the browned shallots, garlic and green onions with the sea salt [affiliate link] and black pepper [affiliate link].

    Coarse Sea Salt, Pepper and the Toasted Shallot, Chives and Garlic

    Doesn’t this look beautiful? This is how the mixture looked before thoroughly mixed. I’m thinking at this moment this would make a GREAT substitute for onion dip! I think I would use twice as many onions, garlic and shallots in that case.

    Cashew "Cheese" with Coarse Sea Salt, Pepper and the Toasted Shallot, Chives and Garlic

    Okay, here is is thoroughly mixed. It looks and smells and tastes like onion dip.

    But that’s a problem… it could totally be used as onion dip, but for cheese ball? It’s way too wet. I should have suspended the cashews while fermenting. But I didn’t really have any way to judge at that time if it was too wet. Now I know.

    Cashew "Cheese" with Coarse Sea Salt, Pepper and the Toasted Shallot, Chives and Garlic

    I plopped the mixture onto parchment paper. I covered the plates with bowls, put one in the fridge and the other in the freezer, hoping they would “set up”. After two hours both were still pretty sloppy looking and had not really set up.

    Cashew "Cheese" with Coarse Sea Salt, Pepper and the Toasted Shallot, Chives and Garlic

    I was about to just use this as onion dip, but then I decided to use my dehydrator! I got these Nesco American Harvest Fruit Roll-Up Sheet pieces to use in my Nesco American Harvest Dehydrator and I decided to spread the onion dip onto this tray and dehydrate for awhile and see if I can get any closer to a cheese ball.

    Into the dehydrator

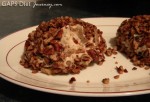
    I left the onion dip dehydrating for just about an hour. I could have let it go longer, as it was still on the wet side, but it had dehydrated enough that I could actually form a ball. I placed the pecans on a plate, then plopped a scoop of the onion dip on top of the pecans, then I got my fingers wet and patted and formed into a ball. I poured pecans on top and patted into the cheese ball.

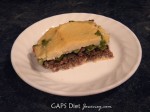
    As you can see my cheese balls are more half mounds than actual ball shaped.

    This is amazingly delicious. I am probably going to take these with me to share at work next week. Thanks, Urban Poser, for such a great recipe!

    White Wine & Pecan Cashew Cheese Ball

    White Wine & Pecan Cashew Cheese Ball

    White Wine & Pecan Cashew Cheese Ball


    GAPS DIET JOURNEY is a participant in the Amazon Services LLC Associates Program, an affiliate advertising program designed to provide a means for sites to earn advertising fees by advertising and linking to AMAZON.COM. GAPS DIET JOURNEY is an affiliate for several companies and may be compensated through advertising and marketing channels. Therefore, this post may contain affiliate links.

  • Shepherd’s Pie GAPS Legal, Dairy-Free, No Potatoes

    Shepherd’s Pie GAPS Legal, Dairy-Free, No Potatoes

    One slice of Shepherd's Pie

    This Shepherd’s Pie tastes very much like the comfort food of my childhood, yet is GAPS legal since it contains no potatoes. It is also dairy-free, feel free to top with some GAPS legal cheese if you so desire.

    Shepherd’s Pie GAPS Legal, Dairy-Free, No Potatoes

    • 6 Tablespoons of your favorite healthy fat, divided use
    • 1/2 cup onion, chopped
    • 1-1/2 pounds ground beef
    • 3 cloves [affiliate link] garlic, crushed
    • 1 teaspoon salt
    • 1/2 t. pepper
    • 3 green onions [affiliate link], sliced, optional
    • 4 cups (about 2 heads) cauliflower
    • 4 cups green beans
    • 3 eggs [affiliate link]

    Begin steaming the cauliflower, it will take about 20 minutes to become fork tender. Be sure to steam the cauliflower well above the level of the water. This is very important as you do not want the cauliflower to be waterlogged.

    Melt 2 Tablespoons fat in a skillet. Add in onion and saute for 2-3 minutes. Add ground beef and crushed garlic. Add in green onions. Cook the ground beef until it is completely done and minced into small pieces. Add salt and pepper. If there is excess fat, drain and reserve for later use.

    While the ground beef is cooking, cook green beans until tender. Chop in pieces 1/2″ to 1-1/2″ in length.

    When tender, remove the cauliflower and place in a food processor. Add in four tablespoons of fat – you may use the fat leftover from the hamburger, or other healthy fat and process until smooth. Add in two eggs and blend thoroughly.

    Preheat oven to 350°F. Grease a 9×12 casserole dish.

    Remove one cup of the blended cauliflower and egg mixture, beat the last egg and mix into the 1 cup of cauliflower.

    Spread this one cup of cauliflower on the bottom of the casserole dish. Spread on top of this the hamburger, layer on the green beans. Finally drop blobs of the cauliflower and egg mixture to the top and spread around carefully until the top is completely covered.

    Bake for 30 minutes. You will find a printable recipe at the bottom.

    Also, stay tuned for a surprise use for this recipe if you have any leftovers. 🙂

    Bottom Layer of the Shepherd's Pie

    Next Layer of the Shepherd's Pie

    Next Layer of the Shepherd's Pie

    Next Layer of the Shepherd's Pie

    Next Layer of the Shepherd's Pie

    Top Layer of the Shepherd's Pie

    Top Layer of the Shepherd's Pie

    Shepherd's Pie Before Going Into the Oven

    Shepherd's Pie

    Shepherd's Pie

    Recipe: Shepherd’s Pie GAPS Legal Dairy Free No Potatoes
    Author: 
    Recipe type: Main Dish, Hearty Meal
    Prep time: 
    Cook time: 
    Total time: 
    Serves: 12
     
    This Shepherd’s Pie tastes very much like the comfort food of my childhood, yet is GAPS legal since it contains no potatoes. It is also dairy-free, feel free to top with some GAPS legal cheese if you so desire.
    Ingredients
    • 6 Tablespoons of your favorite healthy fat, divided use
    • ½ cup onion, chopped
    • 1-1/2 pounds ground beef
    • 3 cloves garlic, crushed
    • 1 teaspoon salt
    • ½ t. pepper
    • 3 green onions, sliced, optional
    • 4 cups (about 2 heads) cauliflower
    • 4 cups green beans, ½” to 1-1/2″ in length
    • 3 eggs
    Instructions
    1. Begin steaming the cauliflower, it will take about 20 minutes to become fork tender. Be sure to steam the cauliflower well above the level of the water. This is very important as you do not want the cauliflower to be waterlogged.
    2. Melt 2 Tablespoons fat in a skillet.
    3. Add in onion and saute for 2-3 minutes.
    4. Add ground beef and crushed garlic.
    5. Add in green onions. Cook the ground beef until it is completely done and minced into small pieces.
    6. Add salt and pepper.
    7. If there is excess fat, drain and reserve for later use.
    8. While the ground beef is cooking, cook green beans until tender.
    9. When done, remove the cauliflower from the pan and allow to cool about 5 minutes.
    10. While still hot, place in a food processor.
    11. Add in four tablespoons of fat – you may use the fat leftover from the hamburger, or other healthy fat and process until smooth.
    12. Add in two eggs and blend thoroughly.
    13. Preheat oven to 350°F.
    14. Liberally grease a 9×12 casserole dish.
    15. Remove one cup of the blended cauliflower and egg mixture, beat the last egg and mix into the 1 cup of cauliflower.
    16. Spread this one cup of cauliflower on the bottom of the casserole dish. Ladle on the hamburger, layer on the green beans. Finally drop blobs of the cauliflower and egg mixture on top and spread around carefully until the top is completely covered.
    17. Bake for 30 minutes.

    Save
    If you love recipes like this, I have two cookbooks you really need to check out ASAP! Beyond Grain and Dairy for gluten-free recipes and Winter SoupsI

    Save

    GAPS DIET JOURNEY is a participant in the Amazon Services LLC Associates Program, an affiliate advertising program designed to provide a means for sites to earn advertising fees by advertising and linking to AMAZON.COM. GAPS DIET JOURNEY is an affiliate for several companies and may be compensated through advertising and marketing channels. Therefore, this post may contain affiliate links.

  • Pretzels Gluten-Free and Grain-Free

    Pretzels Gluten-Free and Grain-Free

    Gluten Free and Grain Free Pretzels

    My oldest son Matthew, who turns 25 today, requested pretzels as part of his birthday meal. It’s been a long, slow struggle to get him off gluten and grains and eating full GAPS. If I had my way, when I started GAPS in December 2009, Matt would have also. I managed to remove pasta and dairy from his diet at that time, but my husband has been reluctant to take all of Matt’s favorite foods from him so slowly I have been removing one more thing. As I’ve been learning more about my own health issues I’ve realized how important it is for Matt to be completely off grains and gluten. For one thing, he has had alopecia since the age of 2-1/2, and I’ve learned that alopecia is actually an autoimmune disorder. This alone indicates that he needs to be eating gluten-free, and some authorities believe dairy products should be completely eliminated as well. Finding the pizza crust to fit this criteria last weekend was wonderful because we have really missed having pizza.

    On Saturday morning, I woke up to find my husband and youngest son trying to figure out what Matt was saying. Matt was drawing the third pree-zoh when I walked out of my bedroom and I started guessing. He said you eat these pree-zohs with butter and salt, and one of the drawings looked like an artichoke but that was wrong. Finally after much guessing, I figured it out. Go Mom! PRETZELS!!

    And then the search was one to find a way to make pretzels for his birthday. I asked on Facebook and several of my fans gave me recipes and I checked them all out but didn’t find one that appealed, so I went searching on my own. I found a recipe for a Soft Cinnamon [affiliate link] Pretzel (It is no longer available on the internet). Nowhere near what I was looking for, but this seemed to be the one. I know it’s a little bit superstitious of me but you know when you get that feeling, “This is the one” then you gotta go with it. Matt has never had a soft pretzel, only the smaller, crunchy ones, and I knew he would be disgusted with me if the pretzels were soft, sweet or tasted like cinnamon! And so inspired by that recipe above, here is my recipe for pretzels.

    • 3 eggs [affiliate link], divided use
    • 1-1/2 cups blanched almond flour [affiliate link]
    • 1/2 tsp. salt
    • 1 T. butter
    • 2-3 T. coconut flour [affiliate link]
    • 1 teaspoon water
    • Coarse salt

    Beat 2 eggs, set aside. Add the almond flour, salt and butter together and mix well. Into this mixture, pour and mix the beaten eggs. You should have a very wet dough. Add in one tablespoon of coconut flour and mix in well. Allow to sit for about a minute as the coconut flour takes a bit of time to absorb. You are looking for a dough that can be easily kneaded, yet will not stick to your hands. Add a second tablespoon of coconut flour, looking for this play-doh like texture. I had to add a third tablespoon to get the desired texture.

    Let the dough rest for five minutes. Preheat oven to 350°F. Liberally grease a cookie sheet.

    Take a hunk of dough about half the size of a golf ball, and use your mad childhood Play-Doh skills to roll the dough under your hands into a long skinny pencil about the length of a pencil.

    Once you have a piece of dough this size, continue to roll it thinner and thinner until it is about twice as long.

    Pretzel Dough About the Size of a Pen

    You will need a piece of dough that is at least 11″ in length to make a small-sized pretzel which is 1-3/4″ tall and 2-1/2″ in width.

    You will need a piece of dough that is at least 14″ in length to make a large sized pretzel which is 2-1/2″ tall and 3″ in width.

    Pretzel Specifications

    Carefully lift the long skinny piece of dough to the cookie sheet. Twist it carefully into the shape of a pretzel – I learned this is easier said than done!

    Place the pretzels in the oven and bake for 10 minutes. Beat the remaining egg and add 1 teaspoon water.

    Remove the pretzels from the oven. Turn the oven up to 400°F.

    Turn all of the pretzels over and you will see the bottom is nicely browned. This is actually the top of your pretzel! Lightly brush with the beaten egg and sprinkle with coarse salt.

    Return to the oven for 5 minutes.

    This recipe made 12 smaller sized pretzels and 4 larger sized pretzels. You should be able to yield 18 smaller pretzels from this recipe. The recipe in printable format is below.

    This post was included at Fat Tuesday.


    Pretzels Gluten-Free and Grain-Free
    Author: 
    Prep time: 
    Cook time: 
    Total time: 
    Serves: 6 – 3 Pretzels each
     
    These gluten-free and grain-free pretzels are a pretty close substitute for real pretzels. Not quite as crunchy as wheat flour.
    Ingredients
    • 2 eggs
    • 1-1/2 cup blanched almond flour
    • ½ tsp. salt
    • 1 Tablespoon room temperature butter
    • 2-3 Tablespoons coconut flour
    • 1 egg and 1 tsp. water for brushing onto the pretzels
    Instructions
    1. Beat 2 eggs, set aside.
    2. Add the almond flour, salt and butter together and mix well.
    3. Into this mixture, pour and mix the beaten eggs. You should have a very wet dough.
    4. Add in one tablespoon of coconut flour and mix in well. Allow for about a minute as the coconut flour takes a bit of time to absorb. You are looking for a dough that can be easily kneaded, yet will not stick to your hands.
    5. Add tablespoon of coconut flour, looking for this play-doh like texture. I had to add a third tablespoon to get the desired texture.
    6. Let the dough rest for five minutes.
    7. Preheat oven to 350°F.
    8. Liberally grease a cookie sheet.
    9. Take a small piece of dough and begin rolling into a long skinny pencil-shape.
    10. You will need a piece of dough that is at least 11″ in length to make a small-sized pretzel which is 1-3/4″ tall and 2-1/2″ in width.
    11. You will need a piece of dough that is at least 14″ in length to make a large sized pretzel which is 2-1/2″ tall and 3″ in width.
    12. Carefully remove the long thin piece of dough to the greased cookie sheet and twist into a pretzel shape.
    13. Press lightly on the twists and where the pretzel connects at the bottom.
    14. The dough is delicate but can be pressed back together easily.
    15. Bake for 10 minutes, remove from oven. The bottom of the pretzel should be nicely browned.
    16. Turn oven up to 400°F.
    17. Beat the remaining egg, adding 1 teaspoon water.
    18. Turn the pretzels upside down and brush the bottom ( side which is actually the top side – the prettier looking side of the pretzel) with the beaten egg.
    19. Lightly sprinkle with coarse salt.
    20. Return to the oven for 5 minutes.
    Notes
    Please note the brands of almond flour and coconut flour that I have used. I have found that coconut flour behaves differently from one brand to the next so your results may vary if you use brands other than the ones I have.
    This batch made 12 smaller sized pretzels and 4 larger sized. If you made all smaller pretzel you should yield 18.


    If you love recipes like this, I have two cookbooks you really need to check out ASAP! Beyond Grain and Dairy and Mastering the Art of Baking With Coconut Flour.

    GAPS DIET JOURNEY is a participant in the Amazon Services LLC Associates Program, an affiliate advertising program designed to provide a means for sites to earn advertising fees by advertising and linking to AMAZON.COM. GAPS DIET JOURNEY is an affiliate for several companies and may be compensated through advertising and marketing channels. Therefore, this post may contain affiliate links.

  • Italian Sausage Hamburger Pizza Sauce

    Awesome pizza!
    In my previous post I shared the step by step photos for making Cauliflower Crust pizza. (April 2018 Update: I have a new easier, streamlined pizza crust! Check it out here: Chard Asparagus Cauliflower Pizza Crust).

    I use hamburger in my meat sauce, but I use spices to give it Italian sausage flavor. This pizza has been a huge hit for our family, and the toppings just make it that much more special. As you can see, we don’t include cheese. If you can have cheese, go for it!

    GAPS Legal Cheese

    f you are on GAPS, mozzarella is not allowed, but these are all acceptable:

    Italian Sausage Flavored Meat Sauce

    • 2 tablespoons healthy fat (lard, bacon grease, butter)
    • 1/2 onion, chopped
    • 1 pound ground beef
    • 1 teaspoon black pepper [affiliate link]
    • 1 teaspoon sea salt [affiliate link]
    • 1/2 teaspoon fennel seed, crushed
    • 1/8 teaspoon ground thyme
    • 1/4 teaspoon paprika
    • 1 cup tomato sauce
    1. Melt fat in a skillet until hot.
    2. Add onions [affiliate link] and saute 2 to 3 minutes.
    3. Add in ground beef and brown completely.
    4. Add in seasonings and tomato sauce when done.

    I also sauteed green bell peppers, mushrooms and red onions, and sliced black olives, to place on the tip top of the pizza!

    Click here for the Cauliflower Crust Pizza Recipe. (April 2018. The updated easier recipe is here: Chard Asparagus Cauliflower Pizza Crust).

    Click here for the photo essay recipe for the Cauliflower Crust Pizza Recipe.

    If you are looking for more Grain-Free and Dairy-Free recipes, I have a cookbook you need to get right now: Beyond Grain & Dairy.

    And if you love snacks, Gluten-Free Snacks has 34 gluten-free snacks, 24 of which are GAPS legal! Get yours today!

    Gluten-Free Snacks Community Cookbook

    Italian Sausage Hamburger Pizza Sauce
    Author: 
     
    Ingredients
    • 2 tablespoons healthy fat (lard, bacon grease, butter)
    • ½ onion, chopped
    • 1 pound ground beef
    • 1 teaspoon black pepper
    • 1 teaspoon sea salt
    • ½ teaspoon fennel seed, crushed
    • ⅛ teaspoon ground thyme
    • ¼ teaspoon paprika
    • 1 cup tomato sauce
    Instructions
    1. Melt fat in a skillet until hot.
    2. Add onions and saute 2 to 3 minutes.
    3. Add in ground beef and brown completely.
    4. Add spices and tomato sauce when done.
    5. Saute green bell peppers, mushrooms and red onions to place on top of the meat sauce.
    6. Other toppings as you prefer: sliced black olives, crushed garlic, pineapple chunks, ham.


    Save

    GAPS DIET JOURNEY is a participant in the Amazon Services LLC Associates Program, an affiliate advertising program designed to provide a means for sites to earn advertising fees by advertising and linking to AMAZON.COM. GAPS DIET JOURNEY is an affiliate for several companies and may be compensated through advertising and marketing channels. Therefore, this post may contain affiliate links.

  • No-Cheese Cauliflower Pizza Crust – Step by Step Photo Recipe

    Cauliflower Pizza Crust - Amazing!!

    April 2018 Update: I have to let you know about my updated recipe which is much easier and streamlined – the steaming of the cauliflower has been omitted altogether! Please click here for Chard Asparagus Cauliflower Pizza Crust (the chard and asparagus are completely optional).

    In my previous post I shared my adapted cauliflower crust pizza. In this post I’m going to share step by step photos for the whole process, and commentary for each step of the way.

    Okay, so this recipe is super simple. Four ingredients: cauliflower, egg, oregano, salt. That’s it. This makes one crust. Depending on your appetite this could feed from one to four, also depending on the person size. 🙂

    You will find a printable recipe at the bottom of this post.

    No Cheese Cauliflower Pizza Crust

    • 4 cups riced cauliflower – this will be one good sized head of cauliflower
    • 1 teaspoon oregano
    • 1 whole egg
    • pinch of sea salt [affiliate link]

    Rinse the cauliflower, shake off any water and break into small florets. Place in your food processor. Pulse until cauliflower is similar in size to pieces of rice.

    If you don’t have a food processor, you can also shred the cauliflower using a potato shredder.

    Cauliflower in the Food Processor

    Here is how it looks riced.

    Riced Cauliflower in Food Processor

    Here are three of the ingredients: riced cauliflower, oregano and a lovely brown egg.

    Three ingredients: Riced Cauliflower, oregano, egg

    Now here is one area where the original poster and I differ. She says to place the riced cauliflower in an inch of water. I know from past experience this will completely water log the cauliflower, so I chose instead of elevate mine well above the water line using a steamer basket. Bring to a boil and steam for 5-6 minutes.

    Riced cauliflower in the steamer

    Line an 11″ x 17″ pan with parchment paper. I coated thecookie sheet with butter first, laid down the first piece of parchment paper (curly side down), buttered the piece of parchment paper and then laid the final piece on top. And one more coating of butter for good measure. I have watched videos of cauliflower pizza crust and it was stuck badly to parchment paper but using the butter seemed to completely remove the problem of sticking.

    Line an 11x17 pan with parchment paper

    When the cauliflower rice is done, place it in a strainer, as you can see not much water drained out initially. Even though my cauliflower was not waterlogged, I did still follow Megan’s advice to place the cauliflower rice into a thin cotton dish towel and squeeze out the liquid.

    Strain the cauliflower rice

    Here is the cauliflower squeezed dry, and the liquid.

    Squeezed cauliflower and the liquid from it

    Mix the cauliflower, oregano, salt and beaten egg together well, and dump onto the parchment paper.

    Egg, oregano, salt and cauliflower

    Form the mixture into a crust. Bake at 350°F for 40 minutes. I kept checking to make sure it wasn’t getting too brown and Megan said 40 minutes and that is exactly how long it took for mine to be done.

    Form into a crust

    And here is the crust! It was easy to remove from the parchment paper and I moved it onto a cooling rack so that it wouldn’t get soggy.

    Top side of the crust

    Here is what the bottom looks like.

    Bottom side of the crust

    Two yummy pizzas!!

    Awesome pizza!

    I seasoned the meat sauce to have an Italian sausage flavor. Click here for the recipe.

    Enjoy! 

    If you are looking for more Grain-Free and Dairy-Free recipes, I have a cookbook you need to get right now: Beyond Grain & Dairy.

    And if you love snacks, Gluten-Free Snacks has 34 gluten-free snacks, 24 of which are GAPS legal! Get yours today!

    Gluten-Free Snacks Community Cookbook

    No-Cheese Cauliflower Pizza Crust – Step by Step Photo Recipe
    Author: 
     
    Ingredients
    • 4 cups riced cauliflower – this will be one good sized head of cauliflower
    • 1 teaspoon oregano
    • 1 whole egg
    • pinch of sea salt
    Instructions
    1. Prepare the cauliflower by removing the outer leaves and stem. Rinse the cauliflower with cool water, then place in a colander and shake to remove water. Break into small pieces. You may want to place in a salad spinner to remove any last drips of water.
    2. Place in your food processor.
    3. Pulse until cauliflower is similar in size to pieces of rice.
    4. Place about an inch of water in a large pot, then place the riced cauliflower in a steamer basket. You don’t want to boil the cauliflower, you want to steam it. Boiling will water log the cauliflower.
    5. Bring to a boil and steam for 5-6 minutes.
    6. While you are steaming the cauliflower, place one egg in a medium sized bowl and beat until completely mixed. Add the salt and oregano, and mix well.
    7. Line an 11″ x 17″ pan with parchment paper. I coated the cookie sheet with butter first, laid down the first piece of parchment paper (curly side down), buttered the piece of parchment paper and then laid the final piece on top. And one more coating of butter for good measure. I have watched videos of cauliflower pizza crust and it was stuck badly to parchment paper but using the butter seemed to completely remove the problem of sticking.
    8. After 6 minutes, remove the cauliflower to a strainer strainer, to remove excess liquid.
    9. Then place one to two cups of the cauliflower rice into a thin cotton dish towel and squeeze out the liquid.
    10. Place the “dried” cauliflower on top of the egg mixture. Once all the cauliflower is squeezed dry, mix together with the egg.
    11. Place the cauliflower onto the parchment papered cookie sheet.
    12. Form the mixture into a crust (see the next post for photos of each step).
    13. Bake at 350°F for 20 minutes.
    14. Turn using a pizza peel.
    15. Bake an additional 20 minutes. The pizza will be browned on the edges.
    16. Remove and place on a cooling rack.
    17. The crust will be browned on the edges. I have seen some videos of folks making cauliflower pizza crust and it stuck really bad, so I was glad that I generously buttered the parchment paper.


    GAPS DIET JOURNEY is a participant in the Amazon Services LLC Associates Program, an affiliate advertising program designed to provide a means for sites to earn advertising fees by advertising and linking to AMAZON.COM. GAPS DIET JOURNEY is an affiliate for several companies and may be compensated through advertising and marketing channels. Therefore, this post may contain affiliate links.

  • Cauliflower Pizza Crust [Dairy-Free, Gluten-Free & GAPS Legal]

    Cauliflower Pizza Crust - Amazing!!

    This recipe is adapted from: The Detoxinista’s Secret to Perfect Cauliflower Pizza Crust. Prior to locating the Detoxinista’s recipe, I found this recipe – which is said to be *THE ORIGINAL* cauliflower crust pizza conceived of by Jamie who blogs at Your Lighter Side – and I’ve wanted to try this recipe since I found it but the recipe calls for equal parts cheese. I assumed the cheese was holding the crust together and would never work without it. It’s 1 cup cauliflower to 1 cup mozzarella, after all. (Remember that mozzarella is not legal on GAPS).

    Another recipe which piqued my interest (The Secret to Perfect Cauliflower Pizza Crust) calls for four cups of cauliflower, but a significantly smaller amount of cheese. Just one-thirds cup of soft goat cheese. A very minute amount in comparison to the original recipe. Such a tiny amount, I mused, could almost certainly be omitted.

    However, there are several cheeses that are legal on GAPS and those are:

    April 2018 Update: I have to let you know about my updated recipe which is much easier and streamlined – the steaming of the cauliflower has been omitted altogether! Please click here for Chard Asparagus Cauliflower Pizza Crust (the chard and asparagus are completely optional).

    I have MISSED pizza in these over two years being on GAPS. And this pizza is a very lovely substitute. I have tried almond flour [affiliate link] crust pizza, but the texture was like biscuits, or pie crust, or brownies. Nothing wrong with those textures, when you’re eating those foods.

    But pizza crust… that’s something else altogether.

    Now I also must warm you that this pizza crust is not EXACTLY like flour dough pizza crust.

    I don’t know if we can every achieve that and remain grain free. But this crust does have a a very nice texture to it that is quite reminiscent of pizza dough, and close enough that I am very thrilled to have found it. And one more thing, I think the toppings are going to have a big effect on the taste. I chose to season ground beef to taste like Italian sausage, mixed some tomato sauce in, and topped my pizza with sauteed onions [affiliate link], mushrooms and bell peppers, and sliced black olives. And a couple of slices of jalapeno peppers.

    It was VERY satisfying and filling. I only ate two pieces and was completely happy with that.

    On to the recipe! Just four ingredients, and this recipe makes one large crust. Depending on who you are feeding, this could serve four people or only one.

    Click here to see photos for each step of this recipe.

    You will find a printable recipe at the bottom of the post.

    Cauliflower Pizza Crust 

    • 4 cups riced cauliflower – this will be one good sized head of cauliflower
    • 1 teaspoon oregano
    • 1 whole egg
    • pinch of sea salt [affiliate link]
    1. Prepare the cauliflower by removing the outer leaves and stem. Rinse the cauliflower with cool water, then place in a colander and shake to remove water. Break into small pieces. You may want to place in a salad spinner to remove any last drips of water.
    2. Place in your food processor.
    3. Pulse until cauliflower is similar in size to pieces of rice.
    4. Place about an inch of water in a large pot, then place the riced cauliflower in a steamer basket. You don’t want to boil the cauliflower, you want to steam it. Boiling will water log the cauliflower.
    5. Bring to a boil and steam for 5-6 minutes.
    6. While you are steaming the cauliflower, place one egg in a medium sized bowl and beat until completely mixed. Add the salt and oregano, and mix well.
    7. Line an 11″ x 17″ pan with parchment paper. I coated the cookie sheet with butter first, laid down the first piece of parchment paper (curly side down), buttered the piece of parchment paper and then laid the final piece on top. And one more coating of butter for good measure. I have watched videos of cauliflower pizza crust and it was stuck badly to parchment paper but using the butter seemed to completely remove the problem of sticking.
    8. After 6 minutes, remove the cauliflower to a strainer, to remove excess liquid.
    9. Then place one to two cups of the cauliflower rice into a thin cotton dish towel and squeeze out the liquid.
    10. Place the “dried” cauliflower on top of the egg mixture. Once all the cauliflower is squeezed dry, mix together with the egg.
    11. Place the cauliflower onto the parchment papered cookie sheet.
    12. Form the mixture into a crust (see the next post for photos of each step).
    13. Bake at 350°F for 20 minutes.
    14. Turn using a pizza peel.
    15. Bake an additional 20 minutes. The pizza will be browned on the edges.
    16. Remove and place on a cooling rack.

    Click here for the Italian sausage ground meat sauce recipe that I use on this pizza.

    Enjoy! 

    Awesome pizza!

    If you are looking for more Grain-Free and Dairy-Free recipes, I have a cookbook you need to get right now: Beyond Grain & Dairy.

    And if you love snacks, Gluten-Free Snacks has 34 gluten-free snacks, 24 of which are GAPS legal! Get yours today!

    Gluten-Free Snacks Community Cookbook

    Recipe: Cauliflower Pizza Crust Dairy-Free and GAPS Legal
    Author: 
    Prep time: 
    Cook time: 
    Total time: 
    Serves: 4
     
    This cauliflower crust has a great texture to it and is the closest thing I’ve found to “real” pizza dough.
    Ingredients
    • 4 cups riced cauliflower – this will be one good sized head of cauliflower
    • 1 teaspoon dried oregano flakes
    • 1 whole egg
    • pinch of sea salt
    Instructions
    1. Prepare the cauliflower by removing the outer leaves and stem. Rinse the cauliflower with cool water, then place in a colander and shake to remove water. Break into small pieces. You may want to place in a salad spinner to remove any last drips of water.
    2. Place in your food processor.
    3. Pulse until cauliflower is similar in size to pieces of rice.
    4. Place about an inch of water in a large pot, then place the riced cauliflower in a steamer basket. You don’t want to boil the cauliflower, you want to steam it. Boiling will water log the cauliflower.
    5. Bring to a boil and steam for 5-6 minutes.
    6. While you are steaming the cauliflower, place one egg in a medium sized bowl and beat until completely mixed. Add the salt and oregano, and mix well.
    7. Line an 11″ x 17″ pan with parchment paper. I coated the cookie sheet with butter first, laid down the first piece of parchment paper (curly side down), buttered the piece of parchment paper and then laid the final piece on top. And one more coating of butter for good measure. I have watched videos of cauliflower pizza crust and it was stuck badly to parchment paper but using the butter seemed to completely remove the problem of sticking.
    8. After 6 minutes, remove the cauliflower to a strainer strainer, to remove excess liquid.
    9. Then place one to two cups of the cauliflower rice into a thin cotton dish towel and squeeze out the liquid.
    10. Place the “dried” cauliflower on top of the egg mixture. Once all the cauliflower is squeezed dry, mix together with the egg.
    11. Place the cauliflower onto the parchment papered cookie sheet.
    12. Form the mixture into a crust (see the next post for photos of each step).
    13. Bake at 350°F for 20 minutes.
    14. Turn using a pizza peel.
    15. Bake an additional 20 minutes. The pizza will be browned on the edges.
    16. Remove and place on a cooling rack.
    17. The crust will be browned on the edges. I have seen some videos of folks making cauliflower pizza crust and it stuck really bad, so I was glad that I generously buttered the parchment paper.

     
    GAPS DIET JOURNEY is a participant in the Amazon Services LLC Associates Program, an affiliate advertising program designed to provide a means for sites to earn advertising fees by advertising and linking to AMAZON.COM. GAPS DIET JOURNEY is an affiliate for several companies and may be compensated through advertising and marketing channels. Therefore, this post may contain affiliate links.